
I've been asked several times how do I make my 'homemade chipboards', so I thought I would share with you this very very simple thecnique.
It's easy to make, cheaper than buying chipboard, it's available in any shape and color you want, and on anytime you need it, not to mention that it's a recycling project.
Of course it would probably be less 'perfect' than those you can buy, but I really don't mind it. I just like my imperfection.
So let's get to work!
You'll need:

A pencil
A cutting tool (can by scissors, crafters knife, etc.)
Some acrylic paint
A brush
Diamond Glaze (optional, only if you wish to give the 'chipboard' a shiny look. you can also use glitter powder or anything else you desire to give a beautiful coat)
optional - a stencil or a template for the pattern you wish to make
Step 1:
Draw your pattern on the cardboard
 Step 2:
Cut the pattern, using your cutting tool, and take it from the cardboard.

 Step 3:
A brush
Diamond Glaze (optional, only if you wish to give the 'chipboard' a shiny look. you can also use glitter powder or anything else you desire to give a beautiful coat)
optional - a stencil or a template for the pattern you wish to make
Step 1:
Draw your pattern on the cardboard

Cut the pattern, using your cutting tool, and take it from the cardboard.


Paint the pattern with the acrylic paint and let it dry completely (I did it twice, for better covering of the paint).

 Step 4 - optional:
If you wish to give it a shiny look - spread Diamond Glaze generously.
If you wish it to glitter - spread any kind of liquid adhesive, and then put some glitter powder.
you can also stamp it with stamps
You can leave it as it is, for a mat look.
For this chipboard I wanted a shiny look, so I used Diamond Glaze:
 Let it dry completely. This is what you should get:

 And here's an example of a sparkly look:
 You're done! See, I told you - it's simple and easy.
Here's the finished layout:
 And you can give it 'double duty' if you use the 'chipboard' as a stencil for masking, inking etc. Before I adhered it to my lo, I used the chipboard for making a frame on another cs, for future use:
 And here are some examples of using this technique on my layouts:
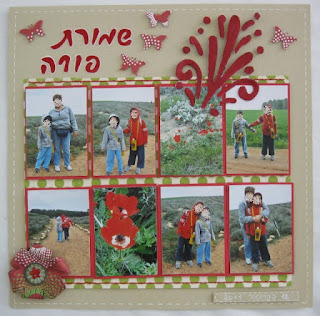


I hope you'll find this tutorial useful for you, and that you'll give it a try.
I would love to read your comments and if you make some homemade chipboards, I would be happy if you link it to this post, so I'll be able to visit you and see.
Get creative....


If you wish to give it a shiny look - spread Diamond Glaze generously.
If you wish it to glitter - spread any kind of liquid adhesive, and then put some glitter powder.
you can also stamp it with stamps
You can leave it as it is, for a mat look.
For this chipboard I wanted a shiny look, so I used Diamond Glaze:


Here's the finished layout:
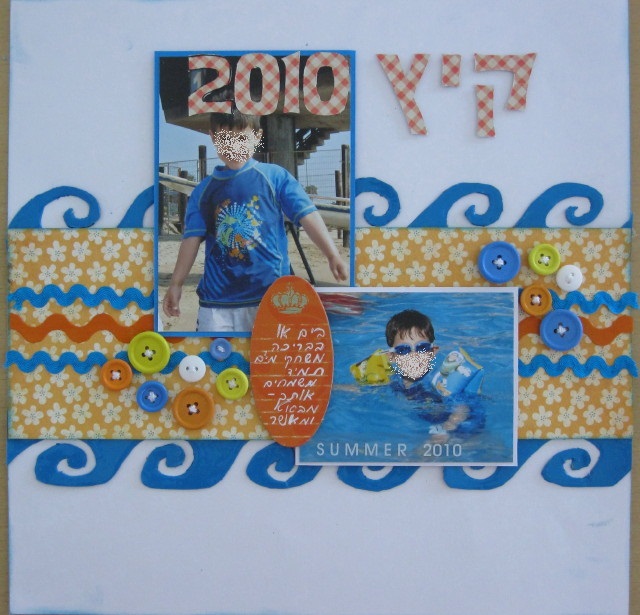


I hope you'll find this tutorial useful for you, and that you'll give it a try.
I would love to read your comments and if you make some homemade chipboards, I would be happy if you link it to this post, so I'll be able to visit you and see.
Get creative....
הדרכה מצולמת להכנה קלה ופשוטה של 'צ'יפבורדים' תוצרת בית. אופציה נהדרת ליצירת קישוטים תוצרת בית, תמיד זמין בזמן, בגודל ובצבע שאתן רוצות. אמנם זה לא יוצא מהוקצע כמו צ'יפבורד קנוי, אבל זה לא חייב להיות מושלם... וזה שלנו, יצירתי ופרוייקט מיחזור נפלא.
החומרים:
קרטון כלשהו (אני משתמשת בקרטונים של אריזות דגני בוקר)
עפרון
מכשיר חיתוך כלשהו (מספריים עדינים, סכין חיתוך מעוגל - מה שמתאים לכן)
צבע אקרילי
מברשת
אופציונלי -דיאמונד גלייז; אבקת נצנצים.
שלב 1:
לשרטט על הקרטון את הדוגמא הרצויה. אפשר לשרטט ביד חופשית או להשתמש בסטנסיל/שבלונה. אגב, הבסיס של דפי צ'יפבורדים קנויים, אחרי שמוציאים מהם את הצ'יפבורד, הם אידאליים לכך, וכך אפשר להכפיל ולשלש את השימוש בדף הזה.
שלב 2:
לחתוך את הדוגמא מתוך הקרטון. בהרבה מקרים אפשר להשתמש גם בנגטיב, כמו שאני עשיתי במקרה הזה.
טיפ - מהניסיון שלי, העבודה עם סכין חיתוך עגול קלה יותר מאשר עם מספריים, וגם משאירה שוליים יותר נקיים.
שלב 3:
לצבוע את הדוגמא בצבע אקרילי. אני צבעתי בשתי שכבות, כדי לתת כיסוי טוב יותר של הצבע. לתת לצבע להתייבש לגמרי (צבע אקרילי מתייבש מאד מהר יחסית, כך שזה לא שלב שלוקח זמן רב).
שלב 4, אופציונלי - הכיסוי:
אם רוצים מראה מבריק - למרוח שכבה נדיבה של דיאמונד גלייז ולתת לזה להתייבש.
אם רוצים מראה נוצץ - למרוח שכבה דקה של דיאמונד גלייז (או של כל דבק נוזלי אחר), ולפזר אבקת נצנצים (אח"כ לתפוס בעדינות ולנער מעל דף/קופסא. האבקה נתפסת רק למקומות בהם יש דבק ואת השאריות מחזירים לקופסא של אבקת הנצנצים).
אפשר גם להחתים על הצ'יפבורד הצבוע (לאחר שהתייבש, כמובן). זה הולך נהדר עם חותמות של כיתובים, דוגמאות סלסולים וכיוצ"ב.
והנה דוגמא לכיסוי מנצנץ:
אפשר גם, כמובן, להשאיר את זה כמו שזה, למראה מט.
זהו!! יש לכן צ'יפבורד תוצרת בית.
והנה הדף במלואו, עם הצ'יפבורדים:
הנה כמה דוגמאות מזמן האחרון, בהן השתמשתי בצ'יפבורד תוצרת בית:
שימוש נוסף בצ'יפבורד- לפני הדבקה על הדף המעוצב, כשבלונה. במקרה הזה, השתמשתי בו כדי להכין מסגרת בדף אחר, בטכניקת מסיכה עם שימוש בדיו דיסטרס:
פרוייקט קליל ופשוט, והאמת היא שגם לא לוקח זמן רב (את שני הצ'יפבורדים הכחולים הללו הכנתי תוך פחות משעה, כשתוך כדי גם הכנתי ארוחת בוקר לילדים, שטפתי כלים ונדמה לי שעוד אי אלו דברים...).
אני מקווה שההדרכה הזאת תהיה שימושית עבורכן. אני אשמח מאד לקרוא תגובות, ואם תשתמשו בטכניקה הזאת ותכינו צ'יפבורדים תוצרת בית משלכן, אני אשמח מאד אם תשאירו לינק בתגובות, ואבוא לבקר ולראות.
שיהיה סופ"ש נפלא!


