Showing posts with label vintage. Show all posts

Tuesday, May 24, 2022

Sending WAVES of birthday wishes - Guest Designer for More Than Words


Last February I was the winner of the mini challenge at More Than Words challenge blog (you can see my card HERE), so I was very honored when the ladies from MTF asked me to be their Guest Designer for May mini challenge.

The Special Guest post.

The challenge is to use the word 'Wave' on your card, tag or atc.


When I saw Mintay Papers 'Marina' collection in my stash, I just had to use them. Such a beautiful collection!

I went back to my former style of multi layers, vintage and distressed look.


It also goes for the color challenge at Just Us Girls:


Thank you for visiting my blog. I appreciate your comments very much.

Saturday, February 9, 2019

Vintage Love - February Counterfiet Kit

I wasn't sure how much scrappy time I would have thin month, but still wanted to play with Counterfiet Kit Challenge, so instead of making a huge counterfeit kit (like I do usually), I went on the concept of a 'page kit'.
The inspiration kit is based on Kaisercraft's 'Anthology' collection. My kit is far away with it's colors, but I was inspired by the vintage feeling, the woodgrain pattern and the floral pattern. I also went on the concept of using one company's papers, so all my papers are from Lemoncraft. The embellishments, however, are a 'mix&match' from my stash.
And so I give you 'Vintage Love':


I've already made a layout from this page kit, and I'm planning on making some cards or a mini mini album from the leftovers.
I will be posting the layout I've made pretty soon, so stay tuned...
Thank you for visiting my blog and I appreciate your comments very much.

Tuesday, December 18, 2018

Treasures from the sea - an altered frame for Art and Soul Challenge Blog

Today I would like to share with you an altered frame I've made for Art & Soul Studio challenge blog.
I was inspired by the current moodboard:
The frame looked like this:
I took the back out and covered it with Finnabair's black gesso, then I worked with a modeling paste and a stencil to give some texture. 
The next step was to color with Lindy's Gang sprays (Tainted Love Teal, Tibetan Poppy Teal, C'est la vie Cerise). Then I adhered trinkets, sea shells and molds, and colored them with Finnabair's acrylic paint - metalic light patina and mermaid sparkle.
The same way I worked with the frame itself, only this time the basis was Finnabair's white gesso.
After all was dry, I added more colros and depth with more Lindy's Gang sprays, this time adding some brownish hues (Shabby Turbine Teal, Afternoon Delight Denim, Clam Bake Beige, Fuzzy Navel Peach, Tawny Turquoise Vintage, Treasure Iland Aqua Vintage).
For the final touch, I added some Finnabair's mini art stones, to get the look of the sand, and some white gesso splatters, here and there.

Here are some close-ups on the details:


Thank you for visiting my blog. I appreciate your comments very much.

Tuesday, March 13, 2018

An all occasions card for Altair Art

Hello dears,
Today it's my turn on Altair Art blog, and I'm sharing a card I've  made.
I love Altair Art papers very much. they're thick and beautiful, with a romantic and shabby chic feeling. They also have strips for fussy cutting and elements. Check their store HERE to see the amazing beautiful collections.
On to my card:
As you may know, I just love multi layers and distressing, so I did them both on this card.
The roses were made also from one of the dp with some MFT Royal Rose dies and I alos used Cheery Lynn mini Fancyful die to make the swirly leaf.
Here are some close-ups to the details:


I would like to enter it to the following challenges:
Creative Embellishments, with this so feminine moodboard, which inspired me with the vintage feeling, the many shades of purple and with the roses. Check their FB page for more details.

Another challenge I was inspired by was at LemonCraft, which is 'Violet Spring', with this beautiful moodboard:
Another beautiful moodboard, that I was inspired by is Summer Studio no. 42:
I was inspired by the big photo of the purple flowers and the green leaves.
Thank you for visiting my blog. Your comments are much appreciated!

Saturday, October 21, 2017

MIni Album with Graphic 45 papers - GD for Mini Album Makers blog

I was invited to be a Guest Designer at Mini Album Makers blog, and today I'm up over there with this gorgeous mini album.


It's a super quick and fun mini album, you can easily make in an hour or so, using one cardstock or designer paper and some DP and embellishments.  The size of this mini album is 5 1/8" x 3 7/8", and it can hold up to 15 small photos plus some journaling tags.  You can either make it as a mini album that stands for itself, or as an insert in a larger mini album, to document separate events or trips, etc.
For a long time I've been intrigued by the concept of 'One Sheet Wonder (OSW)' to make a mini album or an insert that holds a few photos, and I searched Pinterest for ideas.  There are many tutorials, with many variations of OSW, and I decided to use this tutorial by Claudia.  The measurements are in cm, so if you need the instructions to be in inches, you can use this tutorial, which has a table of measurements in inches.

I used papers from a very beautiful Graphic 45 collection - 'Portrait of a Lady'.  For the base I used 12x12 DP (these papers are so thick, and it's perfect for mini albums!) and for the decoration I've used some 8x8 papers, fabric flowers, lace flowers, eyelets and baker's twine.

My mini album is a little different from the original one, as I wantd it to hold more photos, so I did some flaps and pockets, and also made a booklet.  I could do it easily since the construction had gussets of 1/4".

You can see that I've added a small pocket on the outer part of the middle section:

And a little decoration I adhered partially, so it can hold a journaling tag and a small tag for date etc.

And the booklet:

A tip: when making a mini album based on folds and flaps, without a hinge, keep your embellishments in the inner part of the mini flat, otherwise you won't be able to close it properly.

You can close the mini album either with a ribbon (make sure to adhere it to the base before you decorate the front and back cover.  Another option is to use magnets to close the album (again, make sure to put the magnets before decoration the base.

Here are some close-ups:

I hope you'll give this mini album a try. If you do, let me know so I can come and look and leave you some love.
Thank you for visiting my blog. Your comments are much appreciated.

Monday, September 15, 2014

Vintage Altered Cans - Scrap Africa Sept 15th reveal

There's a new challenge at Scrap Africa, and this time the theme is Vintage. I deciede to upcycle tin cans, with a vintage/shabby chic look:
Here are some close ups on the details:


Thank you for taking the time and visiting my blog. I appreciate your comments very much.

Monday, March 10, 2014

Guest Designer at Craft Hoarders Anonymous Challenge Blog

Welcome to Challenge #3 at Craft Hoarders Anonymous Challenge Blog! I'm so honored to be a Guest Designer for March.

Challenge 3 is all about vintage or retro style:
Graphic 45 is our sponsor this month, so let's see what you can make in a vintage or retro style. Do you hoard lace or vintage hat pins? Do you snap up all the postcards at yard sales? Do you love mid-century modern? Do you long for avocado appliances and orange shag carpets? Show your vintage or retro spin on a paper crafting project. 

Here is my project, a vintage style pen holder and a coordinate card:


Challenge Rules can be found HEREMake sure to link your project using the Link Tool on the Craft Hoarders Anonymous Challenge Blog. 

Make sure you visit the Designers and Guest Designers to see what they have 
to share!

Design Team Links:

Amber Milone - http://pinkchicpaperdesign.blogspot.com/

Christy Butters - http://creatingwiththegirls.blogspot.com/

Debbie Seyer - http://www.debbieseyer.com/

Donna Idlet - http://myblogidlet.blogspot.com/

Ginny Nemchak - http://pollyspaper.wordpress.com/

Glenda Brooks - http://glendabrooks.blogspot.com/

Gloria Stengel - http://www.gloriascraps.blogspot.com/

Jan Marie Ennenga - http://re-creations4him.blogspot.com/

Karen Zueger - http://lostcoastscrapper.blogspot.com/

Kathy Clement - http://www.kathybydesign.com/kathy-by-design-news/

Pam Bray - http://www.pammejoscrapbookflair.com/

Tammi Bennett - http://www.tjsmemoriesblog.blogspot.com/

 Thank you for visiting my blog. Your comments are much appreciated.

Supplies used:
wooden pen holder; K&CO. dp, K&CO. die-cuts, Studio Calico pp, My Mind's Eye pp, Kaisercrafts stamps, memnto dye ink,  canson papers, TH distres stain, TH distress ink, acrylic paint, pearls, ribbon, lace trim, CheeryLynn die, Die-namics dies, MS butterfly punch, IB distressing tool, Big Shot.

Monday, July 30, 2012

My Boy - a virtual swap challenge

The Masters of Forgery at Counterfiet Kit Challenge blog did a virtual swap challenge. We were paired and each partner gave the other a list of 10 top items, from which we had to choose at least 5 items to include in our layouts.
My parnter was the very talented lady, Susanne, who gave me this list:
1) Vintage theme patterned paper;
2) Color core cs;
3) Plain chipboard elements to be altered;
4) Perelized vintage style buttons;
5) Raised alphabet letters, preferably in a script font;
6) Paper flowers;
7) Stickers;
8) Ribbon;
9) Something metal;
10) A stamp
I managed to use ALL 10 items, and this is what I came up with:
The photos are of my youngest, from the last 2 years.
The items I used are:
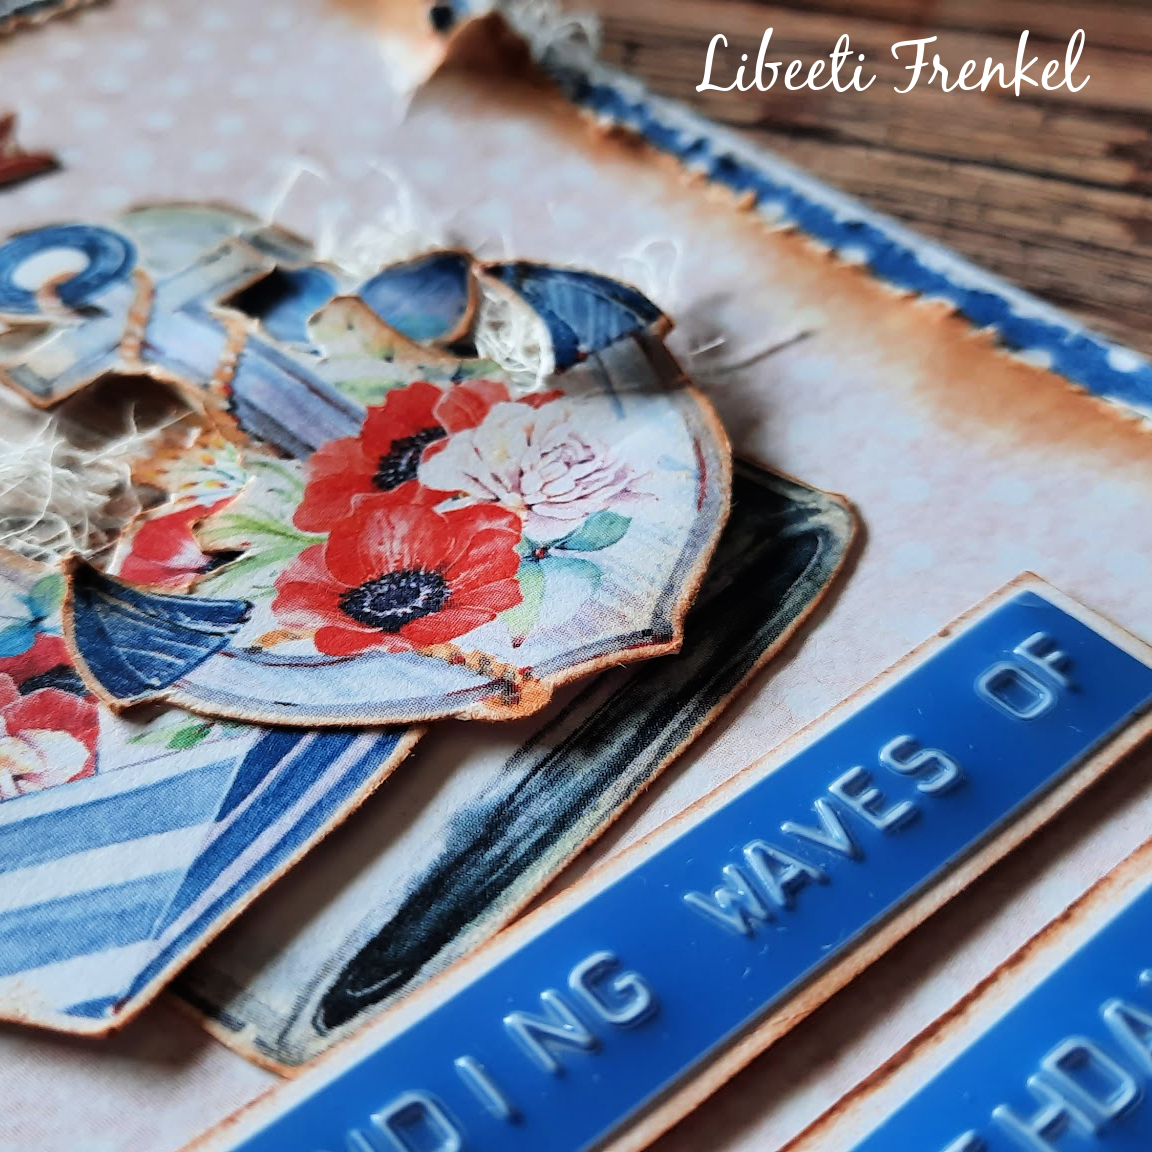
Vintage pp is Bo Bunny, and so are the trinket and the butterflies (both for the metal item, along with the flower brads in the center of the flowers); The plain chipboard is the bracket frame, which I covered with gesso and then used distress ink to paint it; the pale blue cs is color core; I used 3 vintage style buttons from my stash and adhered a tiny pearl in the middle of each one of them; the raised alphas are Thickers, but the scrift font I had didn't fit to the whole lo, so I used another font; for the paper flowers I mixed some Prima flowers along with my handmade flowers; the photo frames are EP stickers (from my June Counterfeit Kit); I tied a little riboon on top of the vertical stripe, and used a stamp on the upper right side. 
Here are some close-ups on the details:


You should pop over to Susanne's blog, to see what beautiful layout she made with MY list... and you also should hop to the other CKC ladies, to see how they challenged each other.
Thanks for stopping by! I love reading your comments.
בבלוג של קיט החיקוי, חברות הצוות השתתפו באתגר פרטי פנימי - התחלקנו לזוגות, וכל אחת שלחה לבת הזוג שלה רשימה של 10 פריטים, מתוכם בת הזוג צריכה הייתה להשתמש ב-5 פריטים לפחות לדף המעוצב שלה.
אני קיבלתי את הרשימה הזאת:
1) דף מדוגם וינטאג'י;
2) קארדסטוק עם ליבה צבעונית;
3) צ'יפבורד חלק, לעצב אותו בעצמי;
4) כפתורים וינטאג'יים עם פנינים;
5) אותיות תלת-מימד, רצוי בפונט של כתב יד.
6) פרחי נייר;
7) סטיקרים;
8) סרט;
9) משהו מטאלי;
10) חותמת.
בסופו של דבר שילבתי את כל 10 הפריטים:
קארדסטוק הבסיס הוא עם ליבה צבעונית; הדף המדוגם הוא במראה וינטאג'י, של BO BUNNY; המסגרת של סוגריים היא צ'יפבורד שכיסיתי בג'סו וצבעתי עם דיו דיסטרס; כפתורים וינטאג'יים, ובמרכזם הדבקתי פנינה קטנטנה; אותיות תלת-מימד, אם כי בפונט אחר כי אלו שהיו לי בפונט של כתב יד לא התאימו לדף; פרחי נייר - זה לצד זה פרחי פרימה עם פרחים שהכנתי בעצמי (מצא את ההבדלים....); המסגרות של התמונות הן סטיקרים (מקיט החיקוי של חודש יוני); סרט קטן שנקשר בראש הרצועה עליה הודבקו התמונות; בראדים במרכזי הפרחים, תליון ופרפרים ממתכת; חותמת בצד הימני העליון.
התוספת שלי היא השימוש בגלימר מיסט, מתחת לפרחים וסרט התחרה.
זה היה אתגר מאד כיפי, אם כי השתהיתי מאד בהכנתו, ובסוף הכנתי אותו ממש במהירות (הלו"ז הוזז במקצת בשבילי...).
הקונספט של האתגר הזה מאד אהוב עלי, כי הוא מאפשר מתיחה של גבולות היצירתיות, בהתאם לתכתיבים של מישהי אחרת, ועדיין התוצר הסופי הוא כל כך בסגנון שלי.
תודה על תשומת הלב, ואשמח מאד לקרוא את התגובות שלכן.