Showing posts with label mini album makers. Show all posts

Saturday, March 23, 2019

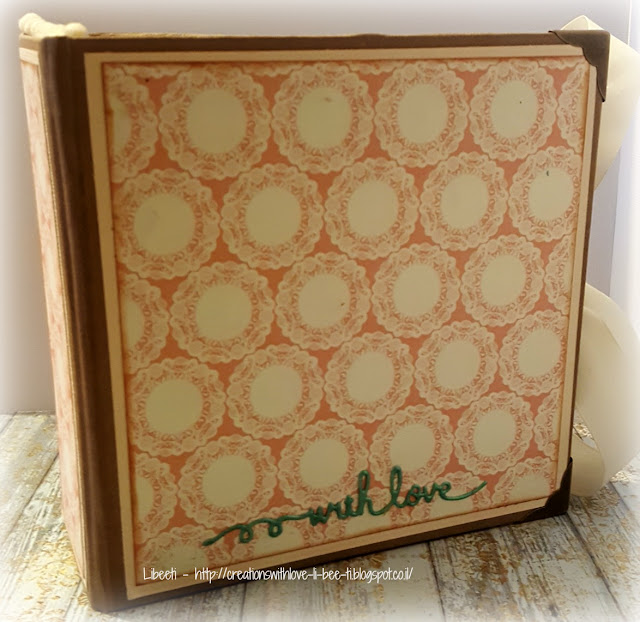
We Are Family - a mini album with Echo Park papers

Happy Saturday dear crafty friends,
Today I'm sharing with you a mini album I've made for a friend from work.
I've made it using THIS tutorial, and it'a super easy project.
I made some changes to adjust it to what I love.
It measurs (outside) 8"X4.5", and on the inside one side is a waterfall and the other one is a pocket, where I placed a mini album. The whole mini album can consist more than 30 photos.
I've also attached a small bag with die-cut embellishments, so she can embellish the mini after adhereing her photos.
Since my friend has 3 young childern, a girl and 2 boys, I used Echo Park papers, which are so perfect for a cheerful and happy mini album.
Here're some photos:


I'm entering it to the March challenge at Mini Album Makers:
and also for a local challenge, to use DT's tutorial.
Thank you for taking the time and visiting my blog. I appreciate your comments very much.

Friday, March 1, 2019

A wedding mini album, in gold/white/black

Here's a mini album I've made for a friend who got married.
I've used the gorgeous Lucidity 6x6 pad by Piatek13.
I've made the album from scratch - chipboards covered with a beautiful pp, printed with hearts in gold, silver and black. it has a feeling like a fabric.
The mini album measures 8.5"x6" and the pages are 7.5"x5.75".
It has many flaps and pockets and inserts, and can hold 40-50 photos!
Here're some photos and the 'walk through' video:


I'm entering it to the March challenge at Mini Album Makers:
Thank you for visiting my blog. I appreciate your comments very much.

Thursday, January 25, 2018

A girly mini album


Hello crafty friends, today I'd like to share with you a girly mini albume I've made for a friend.
It measures 6.5" by 6.5" and the pages inside are 6" by 6".
It has many flaps and pockets, and can hold more than 50 photos!
I've made it out of scratch, using very thick chipboards for the cover, and heavy cardstocks for the basis of the pages.
I've used mostly the Vintage Bliss 6x6 pad by Simple Stories, adding a few other pp from my stash.
Each page opens twice on one side and has a large pocket to hold a booklet.
Here are some close-ups:


I would like to enter it to the following challenges:
Simonsays Monday challenge - tag it! (there are lots of tags in this mini album)
Simonsays Wednesday challenge - layer it up (lots of layers in this album)
Country View challenges - anything goes
Thank you for visiting my blog. I appreciate your comments very much.

Saturday, October 21, 2017

MIni Album with Graphic 45 papers - GD for Mini Album Makers blog

I was invited to be a Guest Designer at Mini Album Makers blog, and today I'm up over there with this gorgeous mini album.


It's a super quick and fun mini album, you can easily make in an hour or so, using one cardstock or designer paper and some DP and embellishments.  The size of this mini album is 5 1/8" x 3 7/8", and it can hold up to 15 small photos plus some journaling tags.  You can either make it as a mini album that stands for itself, or as an insert in a larger mini album, to document separate events or trips, etc.
For a long time I've been intrigued by the concept of 'One Sheet Wonder (OSW)' to make a mini album or an insert that holds a few photos, and I searched Pinterest for ideas.  There are many tutorials, with many variations of OSW, and I decided to use this tutorial by Claudia.  The measurements are in cm, so if you need the instructions to be in inches, you can use this tutorial, which has a table of measurements in inches.

I used papers from a very beautiful Graphic 45 collection - 'Portrait of a Lady'.  For the base I used 12x12 DP (these papers are so thick, and it's perfect for mini albums!) and for the decoration I've used some 8x8 papers, fabric flowers, lace flowers, eyelets and baker's twine.

My mini album is a little different from the original one, as I wantd it to hold more photos, so I did some flaps and pockets, and also made a booklet.  I could do it easily since the construction had gussets of 1/4".

You can see that I've added a small pocket on the outer part of the middle section:

And a little decoration I adhered partially, so it can hold a journaling tag and a small tag for date etc.

And the booklet:

A tip: when making a mini album based on folds and flaps, without a hinge, keep your embellishments in the inner part of the mini flat, otherwise you won't be able to close it properly.

You can close the mini album either with a ribbon (make sure to adhere it to the base before you decorate the front and back cover.  Another option is to use magnets to close the album (again, make sure to put the magnets before decoration the base.

Here are some close-ups:

I hope you'll give this mini album a try. If you do, let me know so I can come and look and leave you some love.
Thank you for visiting my blog. Your comments are much appreciated.

Saturday, September 30, 2017

Stationery notebook from scratch with Graphic 45 papers

Front cover
Back cover
Here's a stationery notebook I've made from scratch with Graphic 45 papers, from A Portrait of Lady collection. I've made it for a good friend of mine, a co-worker, who just retiered from work.
The basis for the cover was made out of cereal boxes, covered with black cs, and decorated with these beatiful feminine papers.
The closer is with a magnet, and I added some die-cuts made with my big shot. I wanted the cover to remain flat, so it will be easy to put it into the nandbag without damaging it.
In the inside, I made a pocket for notes, with a mini calendar on it, plus a stick-it notes holder and a place for a writing pad.

Here are some close-ups:


I would like to enter it to the challenge at Mini Album Makers 
And the 'anything goes' challenge at SimonSaysStamp Wednesday challenge.
Thank you for visiting my blog. Your comments are much appreciated.