Showing posts with label paper straws. Show all posts

Wednesday, September 18, 2013

S is for Smile

Edit: this lo is on the 

This week's case file at CSI is so beautiful, with subtle colors and wonderful inspiration, and this is my take on the case, plus the current challenge at Scrap Africa, which asked to use washi tape and twine.
The photos are of my youngest, from a fun day we had at the Biblical Zoo at Jerusalem. Apart from the animals, there's a lovely playground, with beautiful and colorful scalptures, where the kids can climb and play.
I took many photos that day, and I really love these photos of my son, smiling and looking so happy.
Here's case file #89 from CSI:
My 'clues' to solve the case were:
Scheme - I used all 5 colors.
Sketch (by Emma Stafrace) - multi-photos skethces are very challenging for me, so I used only 2 photos. Apart from that, I kept true to the sketch.
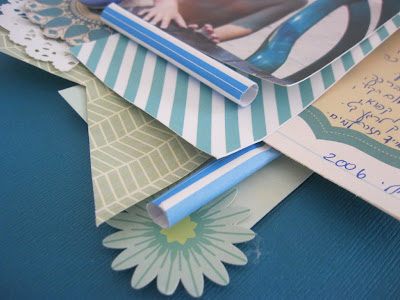
Evidence - animal accents, polka dots, stripes, straws (I made mine from washi tapes), brackets, two alphabets, book pages, a flag (the dotty elephant is holding one), triangles.
Testimony - I used the alphabet to journal and there're brackets around my journaling. I documented the fun day at the zoo: "your smashing smile shows your joy on a fun day at the Biblical Zoo in Jerusalem. Always smile to the world, and the world will smile to you back".
Here're some close-ups to the details:


I used texture modeling paste with a CW circle mask , and whet it dried, I inked it a little with distress ink. The journaling spot is a stamp, and so are the dotted animal on the parade. The sunshine flair button is Purple Pumpkin's.
Thank you for taking the time to visit my blog and your comments are much appreciated.
דף לאתגר המשולב ב-CSI וכן לאתגר בבלוג של Scrap Africa, שבו צריך היה להשתמש בוואשי טייפ ובחוט.
התמונות הן של צעיר הבנים, מיום של כיף בגן החיות התנ"כי בירושלים.
השתמשתי, כמובן, בוואשי טייפ שונים, אשר מחלקם גם הכנתי את ה'קשים'. עבדתי עם משחת עיצוב עם טקסטורה על מסיכת עיגולים, וכשהתייבש - טופפתי קלות עם דיו דיסטרס. החיות המנוקדות, כמו גם קוביית הכיתוב, מחותמות.
תודה שקפצתן לבלוג שלי, ואתן מוזמנות, כתמיד, להשאיר את תגובותיכן. אני תמיד שמחה לקרוא אותן.

Monday, April 1, 2013

Frozen in the summer

This is my 3rd post today...
For Counterfeit Kit April reveal blog hop, 
please click HERE!
The 1st challenge for April at About A Boy is 'Chevrons'. yes, this trendy pattern. easy peasy, right?
I've made my layout from scraps, most of them from my March Counterfeit Kit, and others. For the chevrons theme I used Studio Calico chevron mask and then I embossed it with white Imagine embossing powder. I also used pp with chevrons pattern. 
The photo is of my eldest, about 7 years ago. It was a very hot summer day, and he just got out of the pool, and he was freezing!!
I also used Cheery Lynn Franch Pastry die, some Cosmo Cricket's stickers and a Purple Pumpkin's flair button.
Here are some close-ups on the details:


So now it's your turn to show us your 'chevrons' layouts, but do remember - only boys allowed here!
Just before you leave, I wanted to tell you about a lovely blog candy Sveta is having for her coming birthday:
Check it HERE.
Thank you for taking the time and visiting my blog. I would love to read your comments. Happy Pessach and Easter!
האתגר הראשון לחודש אפריל בבלוג של About A Boy, הוא זיגזגים (chevrons). הדגם הכל כך טרנדי הזה שולט בעולם הסקראפ (ולמען האמת בעולם העיצוב בכלל).
התמונה היא של הבכור, לפני כשבע שנים, בעיצומה של מלחמת לבנון השניה. בילינו בבריכה, בעוד בריכה שארחה כל כך יפה את תושבי הצפון. היה יום קיץ חם מאד, וכאשר הילדון יצא מהבריכה הוא פשוט היא קפוא, למרות מזג האוויר החם. הוא הפשיר חיש מהר וחזר לשחק בהנאה מרובה במים.
הדף שלי הוכן כולו משאריות, ברובן מקיט החיקוי של חודש מרץ. השתמשתי במסיכת זיגזגים של סטודיו קליקו, עם דיו אמבוסינג ואח"כ הבלטה חמה עם אבקת אמבוסינג לבנה. זיגזגים נוספים באו מדף מדוגם עם דוגמה עדינה של זיגזגים. הוספתי כמה סטיקרים, קשית נייר שהכנתי בעצמי,  וחיתוך של דוילי עם הביג שוט. כפתור עם נושא מתאים (flair button) ואותיות של 'תוצרת הארץ', והדף מוכן.
יצא דף מונוכרומטי מרובה שכבות. ולמי ששואלת איך להכין דף מרובה שכבות, כל מה שאוכל לומר הוא שהאתגר הגדול שלי הוא להכין דף עם מעט שכבות... אני כמעט לא מסוגלת שלא להוסיף עוד ועוד שכבות, אחרת זה נראה לי 'ריק'.
ורגע אחד לפני שאתן הולכות מכאן, אני רוצה לספר לכן על בלוג קנדי משגע של סווטה, לכבוד יום הולדתה המתקרב. סווטה היא יוצרת כשרונית, שלא נרתעת מלנסות דברים חדשים, מלאה ביצירתיות ומכינה המון קישוטים בעצמה (וכידוע, זה עניין קרוב מאד לליבי :)))...). 
אז תקפצו לראות את הבלוג קנדי שלה כאן, ובאותה הזדמנות תשוטטו אצלה בבלוג. ההנאה מובטחת.
תודה שקפצתן לבקר, ואשמח מאד לקרוא את התגובות שלכן.

Friday, March 15, 2013

Family - The Sweetest Thing

March 2nd challenge at About A Boy is Scraps - use only scraps for your boyish layout. Everything in my lo is from my March counterfeit kit, and all the dp are scraps. I didn't cut any new dp for this lo, and some of the embellishments are made from scraps too (the paper straw - here's a tutorial I've made; the sub title, the small banners).
I used March sketch from Purple Pumpkin (and also used some of their buttons):
I used Mr Huey's mist and white gel pen for the faux stitching. I also used a homemade paper envelope (and here the tutorial how I've made them).
Here are some close-ups on the details:


It also goes for the 'up, up & away' challenge at Frosted Designs (the owls).
Thank you for stopping by!
האתגר השני לחודש מרץ בבלוג של About A Boy הוא להשתמש בשאריות בלבד. כל החומרים בדף הזה הם מקיט החיקוי של חודש מרץ, ולמעשה אף נייר מדוגם בו השתמשתי כאן לא נחתך במיוחד לדף הזה, כולם שאריות מפרוייקטים קודמים. גם 'קש' הנייר עשוי משארית (לפי ההדרכה שכאן), ואפילו כותרת המשנה היא בעצם הפס שיש בתחתית כל דף מדוגם (במקרה הזה של MME). ממש דף חסכוני. השתמשתי גם בשקיות הנייר המדוגמות (הדרכה להכנתן), בכפתורי בד מנוקדים ומדליקים. השפרצתי קצת Mr Huey's, והוספתי תיפורים בעט לבן. שלושת הינשופים, בשלושה גדלים שונים, התאימו לי מאד לתמונה :)).
תודה שקפצתן לבקר ואשמח אם תשאירו עקבות לביקור...

Wednesday, March 6, 2013

Summer 09 plus winners of my giveaway

Another  lo with my March Counterfeit kit, and this time something a little different from my usual style.  Almost everything in this lo is from this kit, and I only added the pink dp scraps.
I was inspired by the color palette #145 TCR, only instead of a girly look, I used it for a boyish layout, and I think it turned out well.
Here's #145 TCR:
I used March sketch from Sketches With A Twist:
The twist was to use washi tape. Well, I used it in a creaitve way - I've made my paper straw from a washi tape! Here's a tutorial I've made how to make those straws.
In this sketch I was really atracted to the motion of the circles, and to create a motion on my lo, I painted with gesso, then applied some Mr. Huey's mist and stampped with circles stamp.
I was also inpired by this month's challenge at Scrap For Help, which was to use burlap/cheesecloth. Once again I used a plastic cloth tag to indicate the date (09 on the title).
Here are some close-ups on the details:


Thank you for taking the time and visiting my blog. Your comments are much appreciated.

And now for the winners of my giveaway -like I've stated at the begining, only entries that were put in the Linky tool AND that the person is on the 'follow me' list of my blog, could win my giveaway, so unfortunately I had to ignore entries that did not meet those requierments.
With that said, the random winners are
10 - כרמלי
14 - עינבל פיק פוק
21 Astrid de Bear
Will the winners please send me your mail address, so I can ship your prize. You have 7 days to contact me - libeeti at gmail dot com. 
דף נוסף מקיט החיקוי של חודש מרץ, בסגנון לא כל כך שגרתי אצלי. פלטת הצבעים ב-TCR הייתה הפעם  מאד נשית, אבל אני חושבת שהיא יכולה גם ללכת עם דפים של בנים, והתוצאה מוצאת חן בעיני. כדי ליצור את תחושת התנועה בדף, שמאד איפיינה בעיני את הסקיצה בה השתמשתי, מרחתי ג'סו במעין פיתול מלמעלה כלפי מטה, השפרצתי קצת Mr. Huey's והחתמתי עם חותמת עיגולים. הייתה דרישה גם לשימוש בוואשי טייפ, אז השתמשתי באחד מקשי הנייר שהכנתי מוואשי טייפ. כמצע לקשים השתמשתי בגאזה, שזו הייתה הדרישה באתגר אחר. הוספתי גם גאזה מתחת לאחת מפינות המטאינג ומתחת לפרח שבראש הדף, כדי לאחד את המרכיבים בדף.
התמונה היא של צעיר הבנים, בקיץ 09, בקייטנה שבה השתתף. כשאני מסתכלת על התמונה הזאת, אני נדהמת מחדש כמה הוא גדל ב-4 השנים שחלפו.
תודה שקפצתן לבקר ואשמח לקרוא את תגובותיכן.

Friday, March 1, 2013

March Counterfeit Kit Blog Hop - The Bright Side of Life

A new month means a new counterfeit kit and blog hop!  
This month we have a talented scrapper to join us as a Guest Designer - Dawn. You should hop to her blog and see all her beautiful works!
If you came here from Julie's blog, then you're on the right track. If you came here directly and you want to do the hop, please start at Counterfit Kit Challenge blog, and follow the line of Master Forgers' blogs.
This month's inspiration kit is  Soda Shoppe from Noel Mignon:
What cought my eyes with this kit was how colorful and cheerful it is, so I went with most of it's colors - red, orange, yellow, blue (with different shades of this color), some green and a little grey.
My papers:
Solid cs in red, cream, kraft, white and blue;
Patterned papers:
1st row - My Mind's Eye 'On the Sunny Side'/Sweet Chevron; Fancy Pants 'Childish Things'/Toy Box, 'Summer's End'/Changing; Crate Paper 'Farmhouse' collection/ Cross Stitch; Pink Paislee 'Vingage Vogue'/Beauty Parlor; DCWV/The Cafe' Mediterranean Stack.
2nd row - Jillibean Soup Country Pumpkin Chowder/Toasted Pumpkin Seeds; My Mind's Eye 'Indie Chic'/What a day; Jillibean Soup 'Country Pumpkin Chowder'/Ground Cinnamon; Echo Park Dots&Stripes/Banana Tiny Dots; Fancy Pants 'Summer's End'/Cards; Echo Park 'So Happy Together'/Happy Tune.
Here are some close ups on the ebmellihsments:


The embellishments: Cosmo Cricket stickers, American Crafts Thickers (Doll), My Little Shoebox tiny alphas, Doodlebug alphas rub-ons, Hebrew velvet alphas, Purple Pumpkin fabric buttons and star flair buttons, homemade paper straws (here's a tutorial how I've made them), an assortment of buttons from my stash, pre-cut glitter foam stars (with my bigshot), homemade chevrons envelopes (I will be posting a tutorial in a few days), 3-D owls stickers (unknown manufacturer), washi tapes (some of them are Purple Pumpkin's) and stickers (I can't recognize the manufacturer).
I've already made a lo from this kit, my DT submission for About A Boy March 1st challenge, and I will be posting it tomorrow, along with the winners of my giveaway. On Sunday, March 3rd, I will be posting my lo for CKC 1st challenge, so there are plenty of reasons to come back here in the next few days :)).
Your next stop on the hop is the delightful Lisa, with her awesome counterfeit kit. 
Thank you for stopping by!
חודש חדש משמעו קיט חיקוי חדש. קיט ההשראה הפעם היה צבעוני  ועליז, ומלא בדגמים של זיגזגים. הלכתי בעקבות ההשראה של הצבעים העליזים והדוגמאות, והרכבתי את הקיט שלי, אם כי הוא קטן יותר מקיט ההשראה (שהוא עצמו פשוט ענק). הכנתי גם חלק מהקישוטים בעצמי - את 'הקשים מנייר' ואת שקיות הנייר עם דוגמת הזיגזגים. העליתי כבר פוסט הדרכה ל'קשים' ובקרוב מאד אעלה גם פוסט הדרכה לשקיות הנייר. הוספתי לקישוטים גם סטיקרים, סרטי וואשי טייפ, כפתורי בד מנוקדים (הם פשוט מקסימים!), כפתורי עץ ופלסטיק מהאוסף הפרטי, כפתורי מתכת עם כוכבים, וחיתוכי סול מנצנץ שנחתכו בעזרת הביג שוט.
דף ראשון מהקיט הזה כבר הכנתי,  לאתגר של About A Boy, ואעלה אותו מחר, ביחד עם הזוכים בבלוג קנדי שלי. ביום ראשון יעלה פוסט עם הדף שהכנתי מהקיט הזה לאתגר הראשון בבלוג של קיט החיקוי, אז יש הרבה סיבות נהדרות לחזור לכאן בימים הקרובים :))).
כל חודש יש מצטרפות נוספות מישראל לקיט החיקוי ואני שמחה על כך מאד. יש המון יתרונות לעבודה עם קיט, הוא חוסך המון זמן בהתלבטויות באיזה דפים ובאיזה קישוטים להשתמש. אפשר גם לבנות קיטים מצומצמים, ולא חייבים להכין קיט ענקי. אז מי  מצטרפת החודש?
תודה שקפצתן לבקר, ואשמח לקרוא את תגובותיכן.

Thursday, February 28, 2013

DIY paper straws - a tutorial

Today is the last day of my GIVEAWAY
you don't want to miss the chance,
so click HERE!

Lately I've been using paper straws on my layouts. I've made those paper straws myself and I wanted to share with you how I've made them. It's really easy peasy, and takes no more than 5 min to make one straw. 
I'll show you how to make them using pp or washi tapes.
לאחרונה השתמשתי ב'קשים' של נייר בדפים המעוצבים שלי, אותם הכנתי בעצמי, אז הנה הדרכה קלילה ופשוטה להכנתם. זה לוקח לא יותר מ-5 דקות להכין 'קש' שכזה. בהדרכה הזאת אראה איך להכין אותם מנייר מדוגם או מוואשי טייפ.
You'll need:
patterned paper
a piece of white paper (I used papers of my printer)
a ruller or scorring board
washi tape
crafter's knife
adhesive
חומרים:
נייר מדוגם
נייר מדפסת לבן
סרגל או לוח קיפול
וואשי טייפ
סכין
דבק

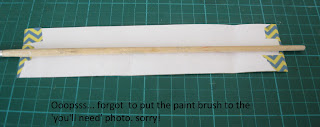
Adhere the washi tape to a piece of white paper. If you need to make a few raws, make sure you lined them up properly (I used 3 raws). trim the excess tape.

הדביקו את הוואשי טייפ על נייר מדפסת לבן. אם אתן מדביקות כמה שורות, תקפידו ליישר לפי הדוגמא (אני הדבקתי 3 שורות עוקבות). גזרו את שארית הוואשי טייפ.


Using a paing brush, roll the paper, with the pattern outside.
בעזרת מברשת צבע, גלגלו את הנייר, כאשר הדוגמא בצד החיצוני.

Spread strong adhesive on the end of the rolled paper, and hold it tited till it dries.
מרחו דבק חזק בקצה הנייר המגולגל. החזיקו לכמה שניות עד שהדבק מתייבש.

And that's what you'll get:
וזו התוצאה שתקבלו:
And the other version, with pp:
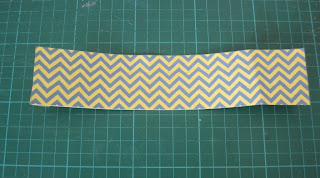
Trim a strip approx 2 inch width.
חתכו רצועה של נייר מדוגם ברוחב של 4-5 ס"מ.

Rolled the pp usuing a paint brush. adhere it in the end, using a strong advesive.
גלגלו את הנייר המדוגם בעזרת מברשת ציור, והדביקו בקצה עם דבק חזק.


And here's your 2nd versiton of the straw:
וזו התוצאה המתקבלת:

Here are two layouts where I used my homemade paperstraws:


I hope you'll find this tutorial useful.
אני מקווה שההדרכה הזאת תהיה לכן שימושית.

Saturday, February 16, 2013

2 Cute

For my GIVEAWAY, please click HERE!
I love it when I get to know a new (to me) sketch challenges, so I was so happy to see that the talented Em Stafrace made a wonderful sketch for Paper Stories, and I  had to give it a try. I combined it with this week's color palette at TCR - #144. The color combo of greens, blue and black are so beautiful and this color combo is perfect for using my Feb Counterfeit Kit (my 6th lo with this kit!)
The photos are of my eldest, about 10 years ago :)). Isn't he just "2 Cute"???
Here's the sketch from Paper Stories:
And here's #144 color palette from TCR:
I used some mists and  applied modeling paste with an arrows mask, and then outlined the edges with a black pen. I also used my newest Bigz, the gears, to cut some chipboard, and then I covered them with gesso and inked them a little. I also used my new fav embellishment - the paper straws.
Here are some close-ups on the details:


I would like to enter this lo also to the following challenges:
bold - frosted designs


דף שישי במספר מקיט החיקוי של חודש פברואר, ובו חזרתי שוב לסגנון של צבעים ודיגום בולטים, עם השפרצות. השתמשתי גם במשחת עיצוב ומסכה של חיצים, ואח"כ עברתי עם עט שחור על קווי המיתאר. הוספתי גם חיתוכים של גלגלי שיניים, מתבנית החיתוך החדשה שלי,  ועוד תוספת קישוטית שמסתמנת כאהבה חדשה שלי - 'קשים' מנייר.
הסקיצה המוצלחת איתגרה אותי להשתמש בהרבה תמונות, וזה אחד הדפים הנדירים שלי שבהם יש יותר מ-2 תמונות. התמונות הן של הבכור, לפני כ-10 שנים, בסופ"ש מופלא שהיה לנו בקיבוץ פרוד. באותו זמן הוא עדיין לא הלך, וההנאה שלו לזחול בשבילי הקיבוץ ועל הדשא, ניכרת היטב בפניו בתמונות.

ולפני שנפרד, יש עדיין זמן להצטרף לבלוג קנדי שלי - כאן!

תודה על הביקור ואשמח אם תשאירו עקבותיכן....