Showing posts with label box. Show all posts

Tuesday, June 30, 2020

Farmhouse style box

When I saw Keren's tutorial for this box, I knew I just have to give it a try.
I used Mintay Papers 'Farm House' collection, and put inside some small cards, with inspirational and encouragements sayings. 

The recipient will be able to change between the cards, as they're attached with a scotch dots.
A close-up on the details, fussy cut from one of the papers:
Thank you for visiting my blog. Your comments are much appreciatec.

Friday, March 27, 2020

Three in a row - scrappy game for kids (and adults...)

One of the local scrapper dragged many of us to make a fun game for the long 'Stay at Home' period, and it became a kind of 'pandemic' at the local scrppy community :).
To make it, all you need is a chipboard, a cardstock and some beautiful patterned papers (we all have it, right?). I actually used leftovers polka dots papers by Echo Park.
I skipped the stage of adhering the pp to a black cardstock, and used only black chipboard.
You can find the tutorial right HERE.
My own boys are too grown up to play with this game, but I made it for a neighbor, who is a nurse with two young kids. I will give it to her, along with one my new 'Thank you' cards, to show my appreciation to her, being in the front line of the battle against the Corona Virus.
It's a game of 3X3 cards, and you need to match them by the half circles.

This is how it looks, when the cards are all mixed up:

And this is how it looks after you solve the riddle:

From the leftovers, I made a smaller version, only 2X2 cards, and I already gave it to another neighbor, a very good friend of mine, who is staying at home with her little one, and it can give her some quite time...
Fetured at Liitle Red Wagon

It is so simple to make it, and so enjoying. You can make it with the kids and then let them play with it.

It goes for the 'Use your leftovers' challenge at Little Red Wagon.
The box for the cards goes for the 'More than one score' challenge at Scor-Pal.

Stay at home, stay safe!
Thank you for visiting my blog. I appreciate your comments very much.

Saturday, March 21, 2020

A DIY cards box - thinking of better days

We have to believe there will come better days, and we will again have lots of happy occasions, reasons to give greeting cards to people we love.
Since lately I'm making lots of greeting cards, and my old greeting cards box is too small for hosting all of them, I made a new one!
It's all from chipboards and patterned papers (Echo Park 'Happy Summer' collection).
I still need to label the dividers...
The measures are 7.5"x5.5"x6", and it can hold over 60 cards!
Basicly, building it is just like the 6x6 stacks holder I made with a tutorial, which you can find HERE.

מאחר שבזמן האחרון אני מכינה  ה-מ-ו-ן  כרטיסי ברכה, והקופסה הישנה כבר לא מכילה אותם, החלטתי להכין להם בית חדש וצבעוני, לקראת ימים טובים יותר שעוד ישובו.
הקופסה נבנתה כמו הקופסה הקודמת, לסאטקים של 6X6, שיש לה גם הדרכה, רק שהפעם המידות קטנות יותר - אורך "7.5, רוחב "5.5 וגובה "6.

Saturday, March 7, 2020

A turorial for DIY 6x6 stack holder

הקופסה הנפלאה שהכינה יעל יוציס  לסטאקים 6X6 מצאה חן בעיני מאד, אבל נדמה היה לי שלאורך זמן קופסה מקארדסטוק צפויה להישחק מכובד הסטאקים (לפחות עם כמות הסטאקים שיש לי...), וגם רציתי קופסה גדולה יותר.
אז הפעלתי את הגלגלים, חישבתי, תיכננתי, טעיתי ותיקנתי ובסוף הגעתי לקופסה כמו שרציתי, והנה גם ההדרכה.
גודל הקופסה הוא 9.5 אינץ' על 6.5 אינץ' מידות פנימיות, כשהמידות החיצוניות טיפה יותר גדולות (רוחב הצ'יפבורדים). היא מכילה לפחות 20 סאטקים מלאים (בפועל הכנסתי בערך 24 סטאקים) והיא יושבת מאד בנוחות בתוך קוביות איקאה בחדר.

2 צ'יפבורדים בגודל 9.5 אינץ' על 6 אינץ' - בשביל הצדדים:
בצד של 6 אינץ', מסמנים 4 אינץ' וחותכים באלכסון לעבר הפינה העליונה, כך שנוצרים הצדדים המשופעים:

חזית - צ'יפבורד בגודל 6.5 אינץ' על 4 אינץ':

אחור - צ'יפבורד בגודל 6.5 אינץ' על 6 אינץ':

בסיס - צ'יפבורד בגודל 6.5 אינץ' על 9.5 אינץ':

והנה כל החלקים חתוכים:

עכשיו מתחילים להרכיב אותם. לחיבור השתמשתי בדבק בד שחור.
קודם מחברים כנף צדדית לבסיס - רצועת דבק בד על הבסיס, הופכים 'על הגב' ומחברים את הכנף הצדדית. שימו לב להשאיר רווח בין שני הצ'יפבורדים כדי לאפשר מרחב לקיפול!:

עוברים עם עצם קיפול לחזק את ההדבקה וגם על הרווח בין הצ'יפבורדים:
לחיזוק וליצירת מסגרת שחורה פנימית, חוזרים על התהליך מהצד השני של הצ'יפבורדים, כולל המעבר עם עצם קיפול:

חוזרים על כך עם הכנף השניה:

מחברים את הפאנל האחורי, באותו תהליך - הדבקה עם דבק בד משני הצדדים וחיזוק עם עצם קיפול:

נשאר לחבר את הפאנל האחרון - הפאנל של החזית. שוב - באותה דרך, והנה כל החלקים מודבקים באופן שטוח:

עכשיו מגיע השלב הקצת יותר מורכב, חיבור תלת-מימדי.
מדביקים רצועת דבק בד על אחד הפאנלים (חזית/אחור) ומדביקים בזהירות את הכנף הצדדית, תוך שמירה על רווח בין הצ'יפבורדים:

את העודף של רצועת הבד צריך להדביק פנימה. מאחר שמדובר בפינה, צריך לחתוך אלכסונים ברצועת הדבק (ובדיוק את השלב הזה שכחתי לצלם...).

עושים כך עם כל ארבע הפינות, והנה הקופסה מורכבת:

עכשיו כדי לחזק ולתת מסגרת שחורה פנימית חוזרים על הפעולה בפאות הפנימיות. זה שלב קצת יותר מורכב, חותכים רצועת דבק בד בגודל המתאים, מדביקים בזהירות בפנים על פאנל אחד, ובעדינות מדביקים את הדבק על הפאנל הסמוך, ועוברים עם עצם קיפול. כך עושים עם כל ארבע הפאות:

החלק של המדוגמים:
אני אישית אוהבת מאטינג צר, אז כל הדפים המדוגמים נחתכו כשהם קטנים ב-1/8 אינץ' מגודל הצ'יפבורדים.

כנפיים:
שני דפים מדוגמים בגודל 5-7/8 אינץ' על 9-3/8 אינץ'.
בצד של 5-7/8 אינץ' מסמנים ב- 3-7/8 אינץ' וחותכים באלכסון לפינה העליונה. הדרך הטובה ביותר כדי לשמור על הדיגום של הניירות היא לחתוך אותם ביחד, כשהצדדים המדוגמים מופנים זה כלפי זה והחיתוך הוא חיצוני (בדיוק כמו שיעל מסבירה בהדרכה שלה):

חזית:
דף מדוגם בגודל 6-3/8 אינץ' על 3-7/8 אינץ':

פאנל אחורי (בחרתי באותו דף מדוגם של החזית החיצונית).
דף מדוגם בגודל 6-3/8 אינץ' על 5-7/8 אינץ'.

טיפ להדבקה שלמדתי בסדנה מחיים אליאסוף מהסדריה: פעמים רבות בקצוות הדבק לא תופס, כי מורחים אותו לא ממש על הקצה. כדי להדביק את המרווחים הקטנים הללו, לוקחים שארית של קארדסטוק, מורחים על הקצה דבק ובעדינות מכניסים אותה בין שתי השכבות, ומושכים בעדינות החוצה, תוך כדי הידוק. כך מקבלים הדבקה טובה ונקיה, בלי לפצוע את הנייר:


בסיס - דף מדוגם בגודל 9-3/8 אינץ' על 6-3/8 אינץ', 
חזית צד פנימי (בחרתי באותו דף מדוגם של הבסיס) 
דף מדוגם בגודל 6-3/8 אינץ' על 3-7/8 אינץ':

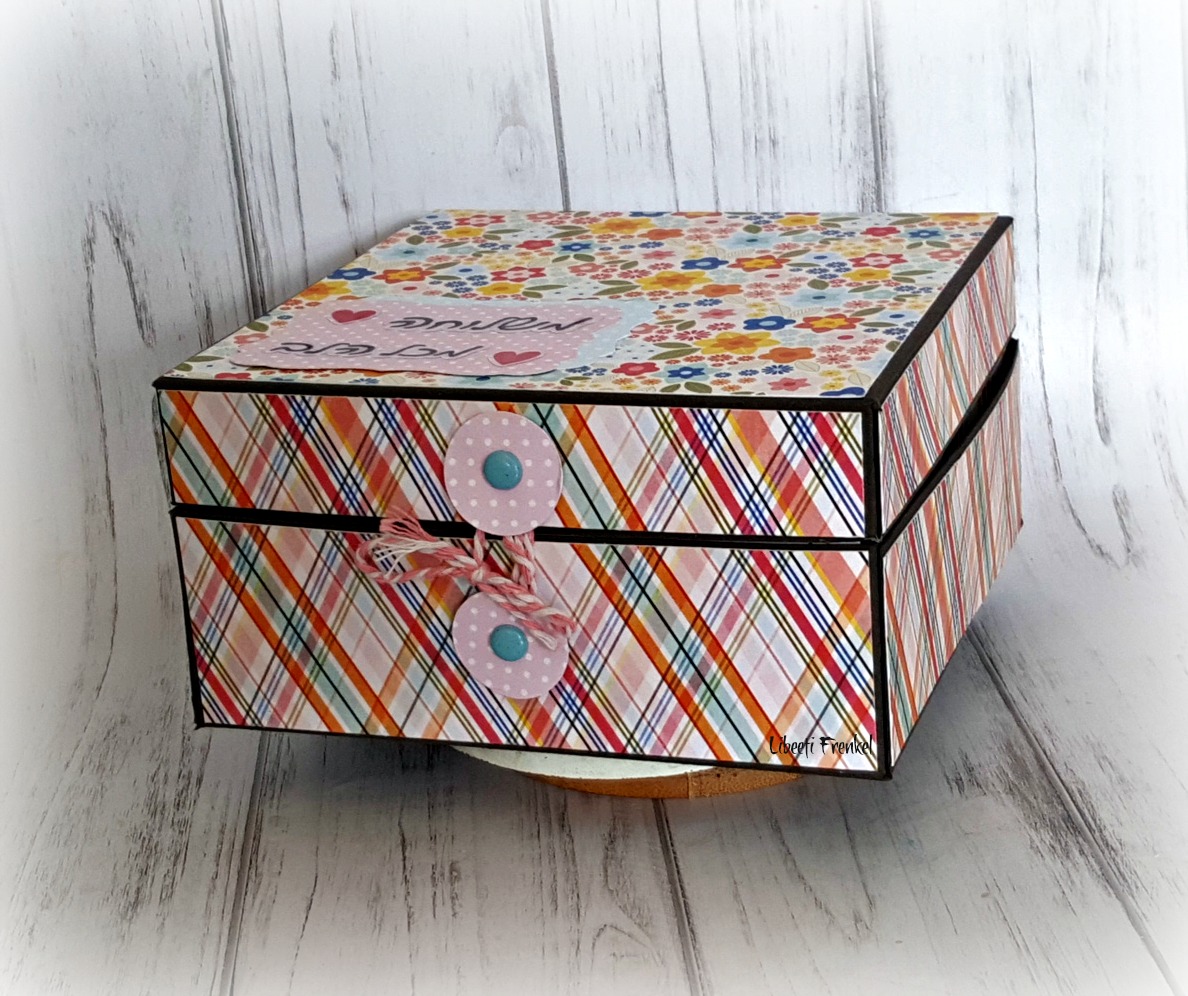
וכך נראית הקופסה כשהיא ריקה, כשבחזית הוספתי  תווית:


וכשהיא כבר מאחסנת את הסטאקים (הרבים, יש לומר..):

מקווה שההדרכה ברורה ומועילה. אם יש שאלות, תכתבו לי בפייסבוק, ואשתדל לעזור.


A chipboard box for 6x6 stacks

I was intrigued by a cardstock box for 6x6 stacks made by Yael Youtiz (HERE), and wanted to make myself one, but from chipboards, to stiffen it.

Edit: I made a tutorial for this box - TUTORIAL

My box is larger than Yael's, it measurs 9.5"X6.5", and it can easily hold more than 20 full stacks!
I used papers from 'It's a Girl!' collection by Carta Bella to decorate my box.
I really love how it turned out.
If you wish me to write a tutorial, let me know in the comments and I will work on one.

מצא חן בעיני הקופסה שהכינה יעל יוציס לסטאקים של 6X6, ואפילו זרקתי לה אתגר להכין את זה מצ'יפבורד. 

אומרים נאה דורש נאה מקיים, לא? אז בינתיים הכנתי לעצמי קופסה מצ'יפבורד, גדולה יותר מזו של יעל. הקופסה שלי בגודל 9.5 אינץ' על 6.5 אינץ' והיא מכילה לפחות 20 סאטקים מלאים (נכנסו לי משהו כמו 24 סטאקים...).
היא מאד חזקה ויציבה ונראה לי שתחזיק מעמד זמן רב.

אם יש עניין בהדרכה, כתבו לי בתגובות ואכין אחת.

Thursday, February 27, 2020

A nautical desk organizer for a men

Top Spout at A Place To Start

Remember the nautical masculine card I showed you a few days ago? so here's the matching desk organizer I've made
All papers are P13 - 'Off the shore' collection.

It goes for the following challenges:
A place to start - a masculine project
Scor-Pal More Than One Score - Anything goes
SimonSays Stamp Wednesday challenge - Anything goes

Thank you for visiting my blog. I appreciate your comments very much.

Friday, February 14, 2020

A colorful treat box

Here's a square box with 4 small treat boxed inside, a perfect gift to give to someone you love and appreciate.
I made it following a tutorial you can find HERE.
This is how the box looks when open, with the 4 small boxes:
I would like to enter it to the following challenges:
Scor Pal - 'Anything Goes' plus 'More than one score'.
Color Dare - #380 palette celebrate today:
C.R.A.F.T #544 -a box or a bag
Simonsays stamps Wednesday challenge - two or more pp.
Thank you for visiting my blog. I appreciate your comments very much.

Saturday, February 1, 2020

A desk organizer and a 'Good Luck' card

A good friend of mine just passed the Bar Exam and started working as a lawyer, so I made her a desk organizer, full of bright colors and flowers.
It has 4 different boxes, 3 sqaures and one rectangle, and they all sit on a tray.
This desk organizer was made using a score board and a bone folder. The hard work was planning the measerments...
I would like to enter it to the 'Anything goes' challenge at 'More Than One Score at Scor-Pal blog.
I also made her a 'Good Luck' card:

Sapphire winner

I used Mojo Monday sketch no. 529:
I would also like to enter it to The Color Dare' no. 379 challenge:
From the inspiration photo I used the teal, pink and yellow, plus black and white. I also put a heart for the love feeling.
Here're some close-ups on the details:

Thank you for visiting my blog. I appreciate your comments very much!