Long time ago, I've made a tutorial about making flowers from a dryer sheet - here. Today I want to show you another versions of dryer sheet flowers.
supplies:
used dryer sheet
needle and thread
glimmer mist/ distress inks/ acrylic paint - any medium you wish to color the dryer sheet
a pencil
scissors
a circluar template (I use chipboard, punched cs, etc)
step 1:
fold the dreyr sheet into half and then again into half (if you're using a bigger circle, fold it only once).
step 2:
using the pencil, draw a circle on the folded dryer sheet. that's what you'll get:
step 3:
Cut the circle with the scissors. you'll get 8 circles.
step 4:
Color 5-6 circles (depending on how much petals you want for your flower). in my example, the red one was misted with glimmer mist and for the blue one I used distress ink.
step 4:
version 1 5 pointed petals flower -
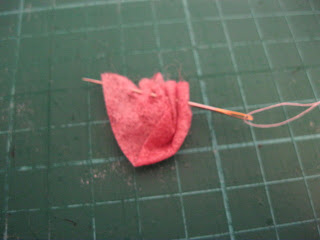
fold the circle in half, and then bring one end to the center of the half circle.
step 5:
with a needle and thread, make stitches on the round edge, pulling the thread.
step 6:
do the same to the other 4 circles, and gather them tightly, to preform the 5 petals flower look.
secure the thread, and that's what you'll end up with:
2nd version - 6 rounded petals flower:
fold the circle in half.
stitch the rounded edge, and gather all 6 petals the same way.
that's what you should end up with:
here are my two versions, side by side:
Do you like it? give it a try. it's very easy and you get to recycle. If you use my tutorial, please credit me with a link to this post, and leave me a comment with a link to your project, so I'll be able to come and leave you some love.
Thank you for stopping by!
גרסה נוספת לפרחים מנייר של מייבש כביסה, עם שתי אפשרויות למראה של עלי הכותרת - מחודדים או מעוגלים.
גוזרים עיגולים מנייר משומש של מייבש כביסה (לפרח עם עלי כותרת מחודדים צריך 5, ולפרח עם עלי כותרת מעוגלים צריך 6 עיגולים). הדרך הנוחה ביותר, מבחינתי, היא לקפל את הנייר לחצי ואח"כ שוב לחצי (או גדול יותר אם העיגול שאתן גוזרות גדול יותר), ואז לגזור. כך מתקבלים 8 עיגולים שווים בגזירה אחת.
עכשיו מגיע השלב להתלכלך.... אפשר לצבוע את הניירות הללו בדרכים שונות. בדוגמא כאן הראיתי צביעה בהתזה של גלימר מיסט וצביעה עם דיו דיסטרס (אפשר, כמובן, בדרכים נוספות - צבעים אקריליים, לדוגמא).
לפרח מחודד עלי כותרת - כל עיגול מקפלים לחצי, ואז מביאים קצה אחד אל האמצע של העיקול המקופל (בתמונה זה די ברור). תופרים תפרים בחלק העגול של העיגול המקופל ומכווצים. כך עושים עם עוד 4 עיגולים ומהדקים את כולם בתפירה, כך שהם צמודים זה לזה ובסגירתם יוצרים צורה של פרח עם 5 עלי כותרת - כולם מחודדים.
לפרח מעוגל עלי כותרת - כל עיגול מקפלים רק לחצי וממשיכים באותה צורה.
את מרכז הפרח אפשר לקשט במגוון קישוטים - פנינה, כפתור, סיכה מתפצלת וכיוצ"ב.
מה דעתכן? מוצא חן בעיניכן? אשמח לקרוא את תגובותיכן.
אני גם אוהבת את המראה וגם מרוצה מהעובדה שאני עושה משהו קטן למיחזור חומרים שאחרת היו נזרקים לפח.
אם תעשו שימוש בהדרכה הזאת, אשמח אם תתנו לינק לפוסט הזה. בכל מקרה, אם תשתמשו בהדרכה, אנא השאירו לי תגובה עם לינק לפרוייקט שלכן, אשמח מאד לראות תוצרים!
תודה רבה על תשומת הלב!


5 comments:
GORGEOUS!!! So FAB! Happy Easter!
awesome!!! ok after i try the twine making i will try this :)
happy passover girlfriend :)
רעיון מעולה, והסבר פשוט ונראה קל.
אני מקווה לנסות מתישהו, שכן אני לא משתמשת בניירות למייבש...
חג שמח!
Clever!
Love the idea of using dryer sheets, very pretty
Post a Comment