Sunday, April 29, 2018

13 assignments - Kraft Plus challenge

Happy Sunday dear crafty friends!
I really loved the current challenge at Kraft Plus, and I'm so happy I finally managed to play along with this challenge.
Here's the challenge's moodboard:
As part of his Bar Mitzva year, my youngest had 13 assignments at school, all around the theme of the Bar Mitzva and getting into adulthood.
He was asked to bring a decorative folder, to hold all the written assignments, so Mummy was so so pleased :).
I took a folder one of the kids' folders, with Spiderman on it (something borrowed), and coverd it with a blue paper to frame the kraft layout. 
I used lots of mediums on this layout - first I primed it with clear gesso, then worked with a modeling paste over a stencil.
Next thing was adding color - Lindy's Gang sprays (Danny Zuko's Denim flat fabio, Sassy Sapphire shimmer, Delphinium Turqouise shimmer and Afternoon Delight Denim shimmer).
Stampping with 7 Dots Studio stamps here and there, splatters of white gesso and Lindy's Gang sprays.
I used Altair Art papers to mat the photo and the big hotair balloon die-cut (a new die - something new), from the Dream Come True 6x6 pad.
For the embellishments I added a piece of vellum, after I stamped with a text stamp, and some die-cut gears (Memory Box die). I also used some vellum diamond shape stickers, Sudio Calico's, that I've been hoarding for years (something old, well pretty old - I think I have them over 6 years..).
As for the blue - I guess I have plenty of blue on this layout, LOL.
Here are some close-ups on the details (just look at all the shimmer on it! love it):


Thank you for taking the time and visiting my blog. I appreciate your comments very much.
Have a wonderful weekend!

Tuesday, April 24, 2018

A feminine steampunk card for Altair Art

Happy Tuesday to you all, today it's my turn on Altair Art blog and I'd like to inspire you with a feminine version of a steampunk card.

Usually, stampunk style is associated with masculine look, hardware, gears, industrial, bold colors, rusty look , etc.
If your style is soft and feminine, you might hesitate to make a steampunk project, but it doesn't have to be like that.

I want to shaw you that you can make a fimine soft project, in a steampunk style.

I used one patterned paper, from the Made of Stars collection, but used both sides of it - the darker one and the brighter and soft one.
I cut 2 rectangles, one slightly smaller than the other, and distressed the edges of both of them:

I adhered the smaller one on the bigger one, so it created sort of dark frame around the soft sublte paper.
Then I stamped on the soft paper with a steampunk style stamp (Blue Fern Studio), using a coordinate color of ink:

The next step was to adher some die-cut cogs (I used some Memory Box dies with my Big Shot). I left the cogs in the plain white color, as white goes perfectly with a soft atmosphere that I wanted to keep. I stampe a sentiment with a similar ink, and adhered the layers to a shimmer cs basis.

The final touch was adhering some dew drops in coordinating colors. Since the dew drops are semi transparent, they also add to the airy feeling.

Here are some close-ups on the details:


That's all for today. I hope you're inspired to make a steampunk project, even if your usual style is different. It so nice to get out of our comfort zone, and expend our creative bounderies.

Monday, April 23, 2018

Frame it! - a canvas frame for a baby girl - Robin's Nest Dt project

Happy Monday to all,
Today it's my turn on the Chattering Robins blog, and I'm sharing a canvas frame I've made for a new baby girl in our family. 
to enhance the canvas, I framed it all around with the beatuful Robin's Nest Dew Drops.
I started by applaying white gesso to the canvas, and then I painted it with lavender acrylic paint.
After it was dry, I adhered a beautiful flowrey patterned paper. 
The next stage was to embelish one corner with lace and paper flowers. 
Thaen I colored it with some pink and violet mediums, diluted with water. I also ahered some tiny pearl hearts to the other 3 corners.
I used purple Dew Drops to frame the whole canvas, which gave a beautiful touch to the canvas.
I also added some green Dew Drops Diamonds around the flowers, so they were also framed by the diamonds.
The final touch was adding the little baby's name and a pucnched butterfly, also decorated in the center with a purple Dew Drops Diamond.
Some splatters with the pink and purple colors, and my canvas frame is done!
Here're some close-ups:


Robin's Nest products that I've used:

Saturday, April 21, 2018

A mixed media card for 13@arts

Hello dear crafty friends!
I hope you're having a fab weekend, and find some time for crafting. 
Today it's my turn on the 13@rts blog, and I'm sharing a mixed media card I've made, using the gorgeous products by 13@rts.

I love working with 13@rts' stencils, as they're pretty thick and easy to work with. I also love the different effects and shades you can get by using the paints/ mists/ color glow, etc. 
If you add water to dilute the paints/ mists, you can get some beautiful different shades of the same color.

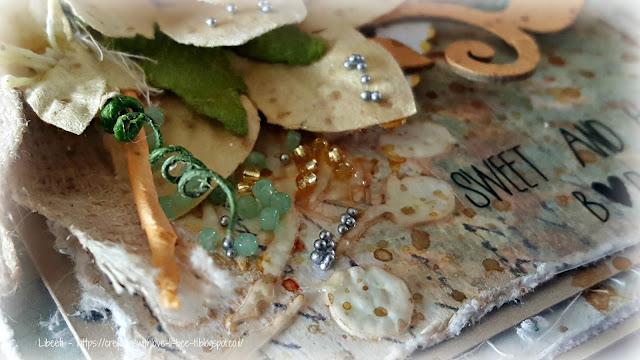
Here're some close-ups on the details.


I've also made a video tutorial of how I've made this card:


For this card, I was inspired by the current challenge at Mixed Media Warriors:
I loved the natural feeling, with earthy colors of brown, cream and green, and I also loved the flowers.
Another challenge I would like to enter this card for is at Scrapki-Wyzwaniowo, which is Gardening:
Studio 75 - spring watercolor
Card Mania CMC - spring
The Ribbon Girl - anything goes
Mixed Media World - anything mixed media goes + spring
Thank you for visiting my blog. I appreciate your comments very much.

Friday, April 20, 2018

A bloom so bright just for you - a card

Happy Friday to you all,
I'm sharing a card I've made using the beautiful Maja Design papers, with the inspiration of the April moodboard over the Maja Design's blog:
I love the color combo of different shades of purple, cream and green, with a touch of pink.
I was inspired by Nancy Dynes' cards. She makes gorgeous cards, with handmade flowers. Love her style.
I've used papers from two collections: Vintage Autumn and Vintage Romance.
Here're some close-ups:


I would also like to enter this card to following challenges:
Dies R Us - springtime (I've used a Cheery Lynn die)
Summer Studio - spring lilac moodboard:
I was inspired by the lilac and green colors and flowers in the moodboard.
Thank you for visiting my blog. Your comments are much appreciated.

Friday, April 13, 2018

Birthday Wishes card for Altair Art

Happy Friday to you!
Today I'm sharing a birthday wishes card I've made for Altair Art:
I have a confession - I just love multilayers, and this card is no exception.
I actually used only one pp, but used both sides of it:


For the topping, I die cut one of the circles from a Ever Dream 10 stripe:


I've used Spellbinders die to cut the image, and other Spellbinders dies to cut the doily and the circle matting.
Here are some close-ups:

I would like to enter it to the following challenges:
Dies R Us - anything goes
Seize the Birthday - anything birthday (I didn't use the topping of vibrant colors)
SimonSays Stamp Monday challenge - inspired by a story (I was inspired by the Hensel & Gretel story, with all the sweets there :)..).
Thank you for visiting my blog. I appreciate your comments very much.

Monday, April 9, 2018

Dew Drops on a Masculine card

Today it's my turn on the Chattering Robin's blog, and I'm showing how you can use the beautiful Dew Drops on a masculine card.
Here' re some close-ups on the details:


The papers are 13@rts.
Thank you for visiting my blog and I really appreciate your comments.

Sunday, April 8, 2018

This is Love - a mixed media canvas for 13@rts

Hello again, dear crafty friends!
At 13@rts blog we have a new challenge with a fabulous mood board:
I was really inspired by the colors and by the theme of love beyond measure, the kind of love I feel for my boys.
I've created a mixed media canvas, with lots of 13@rts products:
And here some close-ups:


For the title I used color glow Amber over Creative Embellishment chipboard, and then I embossed it with 3 layers of UTEE. I just love the way it turned out:
List of 13@rts products that I've used:
stencil - strip mesh
gesso - black, clear
paste modeling 
gel medium transparent
color glow - rubby & amber
Aeeyda chalk mist 
Aeeda pearl old gold
Aeeda paint - metalic! pink
So give it a try and let yourself be inspired by this beautiful moodboard!
Thank you for visiting my blog. Your comments are much appreciated!