Sunday, October 22, 2017

A mixed media birthday card - Lindy's Stamp Gang

Winner of the Autumn moodboard
Continuing with the autumn mood, I've created a birthday card, using Lindy's Stamp Gang products, along with Finnabair's products.
I used papers and embellishments from my October Counterfeit Kit (7 Dots Studio pp, Lemoncraft pp, Prima flowers, Petallo flower, sequins, Robin's Nest's dew drops, DIY enamel dots).
I started applying Finnabair's clear gesso all over the 7 Dots Studio pp, then I used Finabbair modeling paste over a foliage stencil. 
After all was dried, I stamped leaves and foliage stamps (one from 7 Dots Studios, and the other I don't know the manufactor) with Ranger's black Archival ink.
I colored the masking areas with 2 LSG sprays - Go Greased Lightinin Green and Summer Lovin Sun, to get the lime color. With this combination I also colored the swirl die cuts.
The other leaves were colored with a combination of two other LSG sprays - Buccaneer Bronze and Mango Mania.
Then I adhered some microbeads with Finnabair matte gel, and some Prima's & Petaloo's flowers (after adding Finnabair's white gesso on them).
This is how it looked in the process:
Later I added some sequins, DIY enamel dots and Robin's Nest dew drops. 
I added Finnabair's Art Alchemy Sparks Acrylic Paint - Ginger Magic on the flowers and the edges of the sentiment block.
Topping with splatters of LSG Sidewalk Chalk and the lime green sprays combination.
The sentiment was heat embossed, and so was the flower next to the sentiment.
Here are some close-ups:


I would like to enter this card to the following challenges:
Lindy's Stamp Gang October challenge:
I was inspired by the leaves and the orange and green colors.
Mixed Media World - mixed media with a twist - glass or something that imitate glass (the Robin's Nest dew drops are transparent).
Dies R Us - leaves (I used two metal dies: Cheery Lynn's mini fanciful flourish and Die-Namites Large Ivy).
Thank you for visiting my blog. I appreciate your comments very much!

Saturday, October 21, 2017

MIni Album with Graphic 45 papers - GD for Mini Album Makers blog

I was invited to be a Guest Designer at Mini Album Makers blog, and today I'm up over there with this gorgeous mini album.


It's a super quick and fun mini album, you can easily make in an hour or so, using one cardstock or designer paper and some DP and embellishments.  The size of this mini album is 5 1/8" x 3 7/8", and it can hold up to 15 small photos plus some journaling tags.  You can either make it as a mini album that stands for itself, or as an insert in a larger mini album, to document separate events or trips, etc.
For a long time I've been intrigued by the concept of 'One Sheet Wonder (OSW)' to make a mini album or an insert that holds a few photos, and I searched Pinterest for ideas.  There are many tutorials, with many variations of OSW, and I decided to use this tutorial by Claudia.  The measurements are in cm, so if you need the instructions to be in inches, you can use this tutorial, which has a table of measurements in inches.

I used papers from a very beautiful Graphic 45 collection - 'Portrait of a Lady'.  For the base I used 12x12 DP (these papers are so thick, and it's perfect for mini albums!) and for the decoration I've used some 8x8 papers, fabric flowers, lace flowers, eyelets and baker's twine.

My mini album is a little different from the original one, as I wantd it to hold more photos, so I did some flaps and pockets, and also made a booklet.  I could do it easily since the construction had gussets of 1/4".

You can see that I've added a small pocket on the outer part of the middle section:

And a little decoration I adhered partially, so it can hold a journaling tag and a small tag for date etc.

And the booklet:

A tip: when making a mini album based on folds and flaps, without a hinge, keep your embellishments in the inner part of the mini flat, otherwise you won't be able to close it properly.

You can close the mini album either with a ribbon (make sure to adhere it to the base before you decorate the front and back cover.  Another option is to use magnets to close the album (again, make sure to put the magnets before decoration the base.

Here are some close-ups:

I hope you'll give this mini album a try. If you do, let me know so I can come and look and leave you some love.
Thank you for visiting my blog. Your comments are much appreciated.

Sunday, October 15, 2017

All Smiles - Stuck?! Sketches October 15th reveal

A DT layout I've made for the current challenge at Stuck?! Sketches, with this awesome sketch by Laura Whitaker:
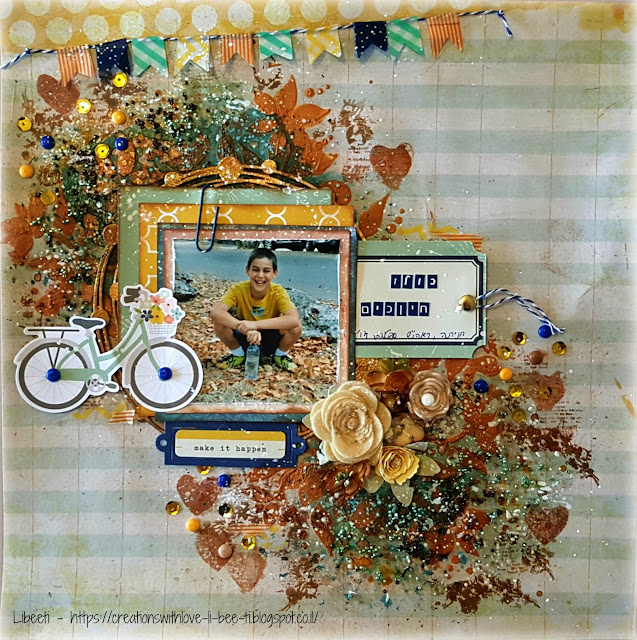
I've used my October Counterfeit Kit, and went a little crazy with the mixed media background. 
I've used Finnabair's products and Lindy's Stamp Gang mists. The circle chipboard under the photo and the pp layers is Creative Embellishments. 
I enjoyed making this lo very much.
Here are some close-ups on the details:


We have wonderful sponsors for this challenge:

Lindy's Stamp Gang offers $25 gc:

And Scrapbook Nerd, with $20 gc:
So will you be joining us? We'd love to see your take on the sketch.

I would like to enter this lo to the following challenges:
Mixed Media Place, with this fab moodboard:
I was inspired by the fall colors and the rusty photo.
Mixed Media Warriors, with their challenge 'Hugs of Autumn',  from this beautiful moodboard:
I was drawn by the combination of the orange and greenish/ mint colors.
Studio 75 - tastes and colors of autumn

Thank you for visiting my blog. Your comments are much appreciated.

Friday, October 13, 2017

A notepad holder plus video tutorial

A friend's daughter starts university in a week or so, and I've made her a notepad holder, sized A4. I also included a pocket for notes.
I also made a quick video tutorial how to make this project:

It's really an easy peasy one, and I hope you'll give it a try.

Friday, October 6, 2017

Me and you, and you and me, so happy together

My clues to solve the case were:
Sketch - done. I changed the place of the title, and made my journaling hidden, on the tag behind the layers.
Scheme- I've used all 5 colors.
Evidence - solid background, floral print (on the tags under the photo), flowers, string (baker's twine), wood, circles, washi tape.
Testimony - I've used the lyrics from 'So Happy Together' by the Turtles for my title, and my journaling is handwritten, and it says: "We've had a tremendous 5.5 days at London, just the two of us. I could be totally devoted to you, and make it up for you after such a complicated year we've been through."
I've used my Oct. counterfeit kit for making this lo.
I'm entering this lo also for the tic-tac-toe challenge at Scrap Our Stash. I've used the lower horizontal line: mini alphas, American Crafts (the solid cs), and die-cuts.
Here are some close-ups:


Thank you for visiting my blog, and I appreciate your comments very much.

LIfe is beautiful - October Counterfeit Kit

New months and new kit to counterfeit, at Coutnerfeit Kit Challenge blog. This time it's not a kit, rather a collection, and one by Prima - St. Tropez:
When I make my kits for the Counterfeit Kit Challenge, I start with the colors, then I go for pattrens and last are elements. 
This is what I came up with for this collection:
Colors - mint/seafoam, navy blue, baby blue, brown, pink, cream, yeallow.
Pattrens - maps, flowrs, tripes, woodgrain, fruits.
Elements - nautical, boarding tickets, journaling cards, hearts, butterflies, bicycles, bloons, crystals, flowers. words - life, hello, ocean, journey.
With all of the above, I dived into my stash and this is what I came up with - 'Life is beautiful', my counterfeit kit:
main kit
rub-ons, smaller pp
alphas
bits & pieces


embellishments (lots of flowers, most of them handmade by me)
And what is a kit without an add-on one? So here's my 'Life is beautiful add-ons':
I really love this kit and I'm already working on a layout I'll be sharing with you in a day or two, so keep an eye.
Thank you for visiting my blog. I appreciate your comments very much.