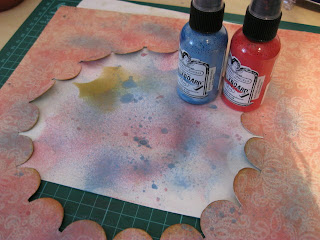
Do you know the feeling when you see a beautiful double-sided dp and you have only one of it but you can not make up your mind which side to use? Well, I felt like this several times...
I have a little tip for you how to use both sides of the dp and make a scalloped circle frame.
You'll need:
Double-sided dp
Crafting knife
Pencil
Circles stencil
Step 1:
Draw a big circle on one side of your dp (the side that you wish to have as dominant on you lo), and then draw small half circles on the inner part of the circle, along the big circle's line. If you don't have circles stencil, never mind. you can use any circle object to draw those half circles.
(tip: the bigger the inner circles are, the bigger your scalloped frame wil be)
Step 2:
Using your crafing knife, cut gently around the small inner scallops.
Step 3:
After cutting along all scalloped lines, fold the scallops. This way the reverse side of the dp will show up.
Step 4:
Gently cut the lines between the scallops, so that you can take off the inner part of the dp.
This is what you should come up with:
(tip: I used the inner part of the dp to make the scalloped border and the rolled rosettes on my lo)
You should have all your scallops folded now. You can either leave them, or you can adhere them to the dp, whether flat or with pop dots.
Optional - time to get messy... :)))
Ink the scallops edges with distress ink: spray some glimmer mist; etc.
You're done!
This is how my circle scalloped looks like:
And here's another lo where I used the same technique. only this time I adhered a lace trim under the folded scallops:
I hope you'll find my tutorial useful and it will help you to make the best out of your papers.
Thank you for stopping by!
כמה פעמים מצאתן את עצמכן מול נייר מדוגם יפהפה, אלא שהוא דו צדדי ושני הצדדים מוצאים חן בעיניכן, ובשניהם אתן רוצות להשתמש? אז נכון, פתרון נוח אחד הוא פשוט לקנות שניים מכל דף שמוצא חן בעיניכן, אבל זה פתרון יקר יחסית. אני רוצה לשתף אתכן בטכניקה נחמדה שמאפשרת לי גם להשתמש בשני צידיו של הדף המדוגם שמצא חן בעיני, וגם ליצור מסגרת עגולה עם סלסולים.
התמונות מדברות בעד עצמן על דרך העבודה. אם יש שאלות, אנא השאירו לי תגובה עם השאלה, ואשמח להשיב על כך.


2 comments:
הדרכה מעולה, תודה!!!
יקירה
אין על הפתרונות החסכוניים שלך! רעיון מעולה ודוגמאות יפייפיות!
Post a Comment