

Today I want to share with you a little trick, how to make those crackled
chipboard alphabeths.
This a tutorial I've made for Sketches In Thyme (so if you've already read it over there, you don't really have to read it once again.. LOL).
A fair notice - it's gonna be very messy.
You'll need:


- Alphabet chipboards (mine were GCD's).
- Acrylic paints - in two contrasting colors. You'll need to decide which of the colors you wish to be on surface and which one will be the 'crackled' one, to reveal from underneath.
- Carpenters' wood glue (I used Elmer's).
- A brush.
Step one:

Paint your alphabets chipboards with the first color (the one to show out from the cracks). Let it dry completely.
Step 2:

Spread the carpenters' wood glue on the painted chipbords. Let it dry completely.
Step 3:

Paint the dried alphabets with the second color. Make sure you're painting on the same direction you spread the carpenters' wood glue, so the cracks will show better (I forgot, and that's why my blue alphabets aren't the best. but look at the cream ones, they're much better!). Did I already mention you need to let it dry completely? Well, please do so.... (yea, I forgot to write down "patience" in the ingredients list...).
Step 4:
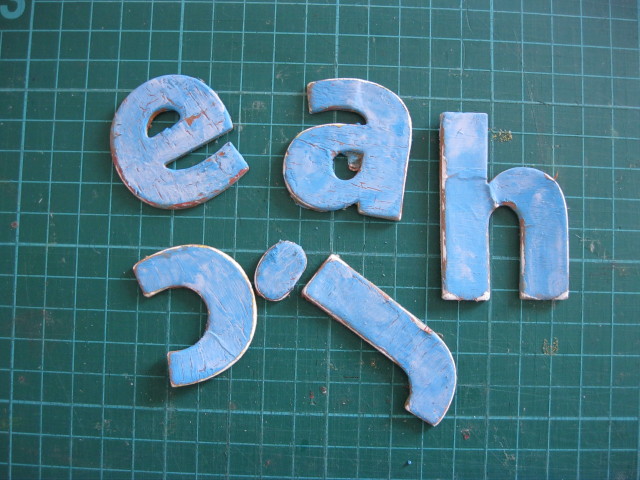
Now you can see the cracks starting to appear! (I added some white acrylic paint, to give a cloudy look, but it's not necessary).
That's it!!
Here are the full layouts with the crackled alphabets:


So how about giving it a try? We'd love to see it, so if you do use this technique, please live us a comment with a link to your creation, so we'll be able to pop over and leave you some love!
Have a lovely weekend!
הדרכה שהכנתי לאתר של Sketches In Thyme על איך להכין אותיות צ'יפבורד עם אפקט הקרקל ("פיצוצים"). ההכנה פשוטה מאד, אם כי צריך זמן וסבלנות (לייבוש בין השלבים השונים). האפקט שמתקבל הוא בעיני מאד יפה - משתלב נהדר עם דפים וינטאג'יים או בסגנון ישן, עם מראה של דיסטרסינג.
תודה על תשומת הלב :).
5 comments:
such a fun technique...thanks for the tut!!!!
This is such a wonderful technique! I love the messy ones! Can't wait to try it out! Thanks so much for sharing it with us!!!!
Blessings,
Kim xXx
So thrilled with your tutorial sweetie, I am also daring enough to try something messy.
well that looks like it will take too much patience for me!! LOL you know i don't have any *wink wink* what beautiful layouts you have created girlfriend. you always add the perfect establishments to make them awesome.
I have so many of these letters and they do not match my papers. Now I can use them up! Thanks for the super great tutorial.
Hugs
Tanya
Post a Comment