Thursday, February 28, 2013

DIY paper straws - a tutorial

Today is the last day of my GIVEAWAY
you don't want to miss the chance,
so click HERE!

Lately I've been using paper straws on my layouts. I've made those paper straws myself and I wanted to share with you how I've made them. It's really easy peasy, and takes no more than 5 min to make one straw. 
I'll show you how to make them using pp or washi tapes.
לאחרונה השתמשתי ב'קשים' של נייר בדפים המעוצבים שלי, אותם הכנתי בעצמי, אז הנה הדרכה קלילה ופשוטה להכנתם. זה לוקח לא יותר מ-5 דקות להכין 'קש' שכזה. בהדרכה הזאת אראה איך להכין אותם מנייר מדוגם או מוואשי טייפ.
You'll need:
patterned paper
a piece of white paper (I used papers of my printer)
a ruller or scorring board
washi tape
crafter's knife
adhesive
חומרים:
נייר מדוגם
נייר מדפסת לבן
סרגל או לוח קיפול
וואשי טייפ
סכין
דבק

Adhere the washi tape to a piece of white paper. If you need to make a few raws, make sure you lined them up properly (I used 3 raws). trim the excess tape.

הדביקו את הוואשי טייפ על נייר מדפסת לבן. אם אתן מדביקות כמה שורות, תקפידו ליישר לפי הדוגמא (אני הדבקתי 3 שורות עוקבות). גזרו את שארית הוואשי טייפ.


Using a paing brush, roll the paper, with the pattern outside.
בעזרת מברשת צבע, גלגלו את הנייר, כאשר הדוגמא בצד החיצוני.

Spread strong adhesive on the end of the rolled paper, and hold it tited till it dries.
מרחו דבק חזק בקצה הנייר המגולגל. החזיקו לכמה שניות עד שהדבק מתייבש.

And that's what you'll get:
וזו התוצאה שתקבלו:
And the other version, with pp:
Trim a strip approx 2 inch width.
חתכו רצועה של נייר מדוגם ברוחב של 4-5 ס"מ.

Rolled the pp usuing a paint brush. adhere it in the end, using a strong advesive.
גלגלו את הנייר המדוגם בעזרת מברשת ציור, והדביקו בקצה עם דבק חזק.


And here's your 2nd versiton of the straw:
וזו התוצאה המתקבלת:

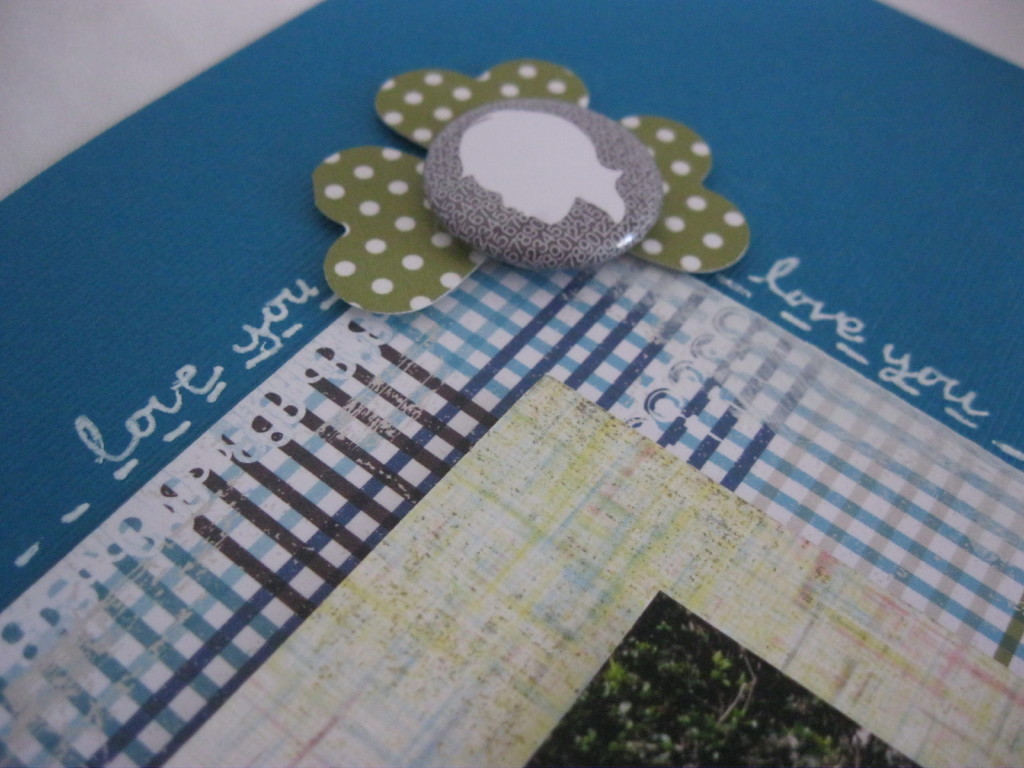
Here are two layouts where I used my homemade paperstraws:


I hope you'll find this tutorial useful.
אני מקווה שההדרכה הזאת תהיה לכן שימושית.

Tuesday, February 26, 2013

Second Child

There are still a chance to win my GIVEAWAY. 
click  HERE for all the details!
Edit: this lo is one of the fav (sketch)
Thank you, ladies!
On the Watch List
case file #60 at CSI

When I saw #60 case file at CSI, I knew right away I'd be working on it with a photo of my youngest. The inspiration photo, full of chocolate and cream immediately reminded me of my youngest's love for chaoclate :)).
The title says, in Hebrew: "Second Child". I used all 5 colors of the scheme.
My 'clues' to solve the case were: circles (polka dots), hearts & tiny brads (on the jouranling tag), layers, drops (stamped with Ranger's brushed corduroy distress ink, and then heat embossed with UTEE), decorative border, something glossy (the heat embossed drops), and solid white background.
For the testimony - hearts on the journaling spot. My jouranling is actually continues the title, and it says: "But not second loved. In mom's heart there's plenty of room for each and everyone of you. I wanted to have you ever since I gave birth to your brother, and I was impatient to finally see you and hold you in my arms. I will always love you, to heaven and back. Mom."
I used Feb sketch from AFSC:
It also goes for Feb challenge at Scrap For Help, which asked to use plastic (and recycled item) - the date on the photo is a plastic tag, part of cloth tags. I'm not sure it can be seen in the close-up, but I hope you'll be able to trace it.
Here are some close-ups on the details:


Thank you for taking the time and visiting my blog. I'd be very happy if you leave a trail to your visit.
דף לאתגר נוסף מבית היוצר של CSI - שילוב של צבעים, אלמנטים  וכיתוב. מייד כשראיתי את תמונת ההשראה, היה לי ברור שאעבוד עם תמונה של צעיר הבנים. תמונת ההשראה, עם עוגה מצופה שוקולד וקרם, הזכירה לי מיידית את אהבתו העמוקה של צעיר הבנים למאכלים מתוקים בכלל, ולשוקולד בפרט.
הג'ורנלינג, בתגית הנסתרת מתחת לתמונה, היא המשך של הכותרת "ילד שני", וכתוב בה: אך לא שני באהבה. בלב של אמא יש המון מקום לכל אחד ואחד מכם. רציתי אותך מהיום בו ילדתי את אחיך, והייתי קצרת רוח סוף סוף לראותך ולהחזיק אותך בזרועותי. תמיד אוהב אותך, עד השמיים וחזרה. אמא".
מתאים גם לאתגר של סקיצה ולאתגר של מיחזור שהקריטריון בו היה להשתמש בפלסטיק. הכיתוב של התאריך, על גבי התמונה, הוא תגית פלסטיק, חלק מתגית של בגד.
בדף הזה השתמשתי בחותמות חדשות של רקעים, של המסטר טים הולץ, ועשיתי להם הבלטה חמה עם UTEE. הן חותמות פשוט מדהימות להוספת עניין ברקע. הפרח והסלסול נעשו שניהם באדיבות ידידי הביג שוט. שכבות של בד יוטה ושאריות דפים מדוגמים בצבעים המתאימים לאתגר, ותגית ג'ורנלינג, שהוצמדו לה שתי סיכות מתפצלות בצורת לב.

יש עוד יומיים לבלוג קנדי שלי, אז שלא תפספסו את הצ'אנס לקבל חבילה נדיבה של גודי'ס סקראפיים - כל הפרטים כאן.
תודה שקפצתן לבקר בבלוג שלי ואשמח מאד אם תשאירו עקבות לביקורכן...

Sunday, February 24, 2013

To Be Free

For my GIVEAWAY, please click HERE!

Each one of us has his own way in life, and I think we all 'try in our way to be free'. And this is what this layout is all about. I used the Feb sketch at My Mind's Eye, and was inspired by case file # 59 at CSI.
Here's the sketch from MME:
And here's the inspiration from CSI:
My clues to solve the case were:
I used all 5 colors. For the evidence:  frames, distressing, a cage, a bird, embossing.
For the jouranling: my inspiration for the title AND the journaling was one of my fav movies - "Like a bird on the wire". I love that movie and even more - the song by Leonard Cohen, so I used some of the song's lines for my title. I also used it on my hidden journaling (on the right side, behind the doilies). My journaling is about my own way in the world to be free, not always in the conventional way, but always being true to myself.
Here are some close-ups on the details:


The lace border and the center of the largest pale pink doily (both MME stamps), the cage and the bird (FabScraps chipboards), all were heat embossed with WOW embossing powder and UTEE.
The jouranling strips were done with my newest toy - the Dymo. I did some fussy cutting with the doiles.
I used different MME collections - Indie Chic, Lost & Found 3, Bluebell, Miss Caroline. Love how they all work beautifuly together.
Thank you for taking the time and visiting my blog! your comments are much appreciated.
דף שהכנתי לאתגר ההשראה ב-CSI, והשתמשתי בסקיצה החודשית של MME.
הכלוב והציפור, צ'יפבורדים של Fab Scraps, עברו הבלטה חמה עם UTEE (שקוף ושחור). גם הבורדר של התחרה השחורה הוא הבלטה חמה (חותמת של MME). רצועות הכיתוב השחורות משמאל לתמונה נעשו עם הצעצוע החדש שלי - DYMO. המסגרת נחתכה מצ'יפבורד אפור באמצעות הביג שוט, וגזרתי בעדינות הרבה דוילי'ס מדף של MME.
למרות שהדף נראה מורכב, הכנתי אותו בשטף ובזמן די קצר. יש דפים כאלו, שפשוט זורמים בקלילות ובמהירות.
תודה שקפצתן לבקר בבלוג שלי וכמו תמיד, אשמח לקרוא את תגובותיכן.

Saturday, February 23, 2013

warriors

For my GIVEAWAY,  please click HERE!

My 7th lo with my Feb Counterfeit Kit, using Feb sketch from Artful Delight. Here's the sketch:
The photo is of my boys, wearing  their costumes, 3 years ago.
I've kept it very true to the sketch. 
As for the chipboards (banner & gears), I used black acrylic paint, black and clear UTEE, and Perfect Perals. I love the way they turned out.
Here are some close-ups:


Thank you for stopping by!
באווירת פורים, הנה דף עם הילדודס בתחפושות, בפורים שלפני 3 שנים. זהו הדף השביעי שלי מקיט החיקוי של חודש פברואר. הייתה לי תמונה גדולה, כך שהסקיצה הפשוטה התאימה מאד.
כקישוטים השתמשתי בצ'יפבורדים (שרשרת דגלונים וגלגלי שיניים), עליהם עבדתי עם צבע אקרילי שחור, UTEE שחור ושקוף ופרפקט פרלס. אני מאד אוהבת את התוצאה שיצאה עם הצ'יפבורדים.
תודה שקפצתן לבקר.

Saturday, February 16, 2013

2 Cute

For my GIVEAWAY, please click HERE!
I love it when I get to know a new (to me) sketch challenges, so I was so happy to see that the talented Em Stafrace made a wonderful sketch for Paper Stories, and I  had to give it a try. I combined it with this week's color palette at TCR - #144. The color combo of greens, blue and black are so beautiful and this color combo is perfect for using my Feb Counterfeit Kit (my 6th lo with this kit!)
The photos are of my eldest, about 10 years ago :)). Isn't he just "2 Cute"???
Here's the sketch from Paper Stories:
And here's #144 color palette from TCR:
I used some mists and  applied modeling paste with an arrows mask, and then outlined the edges with a black pen. I also used my newest Bigz, the gears, to cut some chipboard, and then I covered them with gesso and inked them a little. I also used my new fav embellishment - the paper straws.
Here are some close-ups on the details:


I would like to enter this lo also to the following challenges:
bold - frosted designs


דף שישי במספר מקיט החיקוי של חודש פברואר, ובו חזרתי שוב לסגנון של צבעים ודיגום בולטים, עם השפרצות. השתמשתי גם במשחת עיצוב ומסכה של חיצים, ואח"כ עברתי עם עט שחור על קווי המיתאר. הוספתי גם חיתוכים של גלגלי שיניים, מתבנית החיתוך החדשה שלי,  ועוד תוספת קישוטית שמסתמנת כאהבה חדשה שלי - 'קשים' מנייר.
הסקיצה המוצלחת איתגרה אותי להשתמש בהרבה תמונות, וזה אחד הדפים הנדירים שלי שבהם יש יותר מ-2 תמונות. התמונות הן של הבכור, לפני כ-10 שנים, בסופ"ש מופלא שהיה לנו בקיבוץ פרוד. באותו זמן הוא עדיין לא הלך, וההנאה שלו לזחול בשבילי הקיבוץ ועל הדשא, ניכרת היטב בפניו בתמונות.

ולפני שנפרד, יש עדיין זמן להצטרף לבלוג קנדי שלי - כאן!

תודה על הביקור ואשמח אם תשאירו עקבותיכן....


Friday, February 15, 2013

My Lil' Wonder

For my GIVEAWAY, please click HERE!
Edit: this lo was featured
at C'est Magnifique for their Feb sketch
Our 2nd challenge for February at About A Boy challenge blog is 'Oh, Baby'. You should make a lo, featuring a baby's photo, age 0-1y, but remember is should be a BOY's photo...
The photo in my lo is of my youngest, when he was about 8 weeks old.
For this lo I used my Feb Counterfeit Kit, and I mixed papers from the main kit and the add-on kit.
I used the Feb sketch from C'est Magnifique:
I didn't have a chipboard frame, so I replaced it with a gauze frame. Since I cut my boy's image apart from the photo, I matted it with handmade flowers, and added die-cut doily and  flourishes (Cheery Lynn fanciful flourish and France Pastry- for their 'frame it' challenge).
Here are some close-ups on the details:


It also goes for the shabby chic challenge at happy campers; at anything goes.
So how about joining us and making a lo about a baby boy? it's really an easy peasy challenge, and there's a lovely prize for Feb:
Thank you for taking the time and visiting my blog. 
האתגר השני בבלוג של About A Boy הוא להכין דף עם תמונה של תינוק (בגילאי 0-1 שנה). אתגר קליל ביותר, ויש גם פרס שווה.
בדף הזה השתמשתי בחומרים מקיט החיקוי של פברואר, ושילבתי בין דפים מהקיט העיקרי לקיט התוספת. הפרחים המשמשים מאטינג לתמונה (שנחתכה) עשויים ביד והוספתי סלסולי עלים שנחתכו בביג שוט. כמסגרת השתמשתי בגאזה, והוספתי גם דוילי (גם כן נחתכה בביג שוט) ותגית.
תודה שקפצתן לבקר בבלוג שלי.

Sunday, February 10, 2013

A Perfect Day

For my GIVEAWAY, please click HERE!
This is my take on #15 sketch at my scraps&more sketches, and it's my 4th lo with my Feb Counterfeit Kit. Here's the sketch:
The photo is of my eldest, about 5 years ago, on a sunny Saturday. We really had a perfect day then.
The cogwheels chipboards were cut with my newest die, and then covered with gesso, inked with distress ink and embossed with UTEE, and then topped with these cute heart shape buttons.
Instead of a stripe of patterned paper on the bottom, I've made two paper straws. I moved the title from the upper part and placed it on the paper straws. The embllishmnet on the upper right corner was made from punched hearts and topped with a flair button. I also wrote "love you" as part of the decoration on that corner, and doodled a faux stitched frame.
Here are some close ups on the details:


I would like to enter this lo also to the following challenges:
heart - simonsays
love plus a heart - prosted designs
song inspiration (A Moment Like This) - scrap it with a song
sewing (real of faux) - fairytale
handmade embellishments - craft room (I've made the paper straws myself)
Thanks for stopping by!
הדף הרביעי מקיט החיקוי של חודש פברואר, גם כן בסגנון נו"פ גרפי. הצ'יפבורדים של גלגלי השיניים נחתכו בביג שוט בעזרת תבנית החיתוך החדשה שלי (ומה מתאים יותר מגלגלי שיניים לדף של בנים....), ועברו טיפול מסיבי של ג'סו, דיו דיסטרס ו-UTEE. כקונטרסט, שמתי במרכזו של כל גלגל שיניים כפתור חמוד בצורת לב.
הקישוט בפינה הימנית העליונה הורכב מלבבות מפונצ'צ'ים, ובמרכז הדבקתי flair button. את מיקום הכותרת שיניתי לעומת הסקיצה, והעברתי אותה לתחתית הדף, בהדבקה על 'קשים' מנייר. הוספתי גם מסגרת תיפורים בעט לבן, והדף גמור.
התמונה היא של הבכור, לפני כ-5 שנים, בגן הפסלים בחיפה. זו הייתה שבת קסומה, שהניבה גם הרבה תמונות מקסימות של הילדודס.
את קיט החיקוי של החודש הרכבתי עם שני סגנונות שונים במחשבתי, מחד דפים עם צבעים חזקים ודוגמאות בולטות, שמזמינים עיצובים קלילים ועליזים. מאידך, דפים עם צבעים מרוככים ודוגמאות עדינות, שמזמינים עיצובים רכים ווינטאג'יים. ובין שני הסגנונות הללו אני מזפזפת במהלך החודש.
הנה הצצה קטנטנה לדף אותו אעלה בעוד כמה ימים, שכל כולו בסגנון וינטאג'י:
תודה שקפצתן לבקר, וכמו תמיד, אשמח לקרוא את תגובותיכן.