Monday, February 12, 2018

A shabby chic style envelope box for Altair Art


Hello dear crafty friends and welcome to my blog.
I'm sharing a shabby chic style envelope/box I've made as a DT assignment for Altair Art.
The gorgeous shabby chic papers are so beautiful it makes my heart sing.
The inspiration came from LST #5 at Lemoncraft, with a wonderful tutorial that I follwed very closely. 
I did some mixed media on the front cover, and some Lindy's Gang sprays all over (LSG sprays that I've used: Cotton Candy Pink; Wild Honeysuckle Coral; Pop Rock Purple. I've also used Angel Wings gold embossing powder)
Here's how the back cover looks:


The inside with the pocket, where you can place a chocolate bar, or a mini album, or a greeting card, etc.

And some close-ups on the details:


I would like to enter it to the following challenges:
Lindy's Gang, with this moodboard:
Lemoncraft - LST no. 5.
Scor Pal - more than one fold 'anything goes' 
Summer Studio - moodboard no. 41:
I was inspired by the different shades of pink, by the flowers, the little touch of green and the feminine feeling of the moodboard.
Mixed Media & Art - moodboard:
I was inspired by the soft pastel colors, the pink and the cluster of flowers.
Thank you for stopping by. your comments are much appreciated.

An altered storage tray

 
This is my DT project for The Robin's Nest blog, using the beautiful Dew Drops.
A girl can never have too many Lindy's Gang products.... but she needs a place to store them!
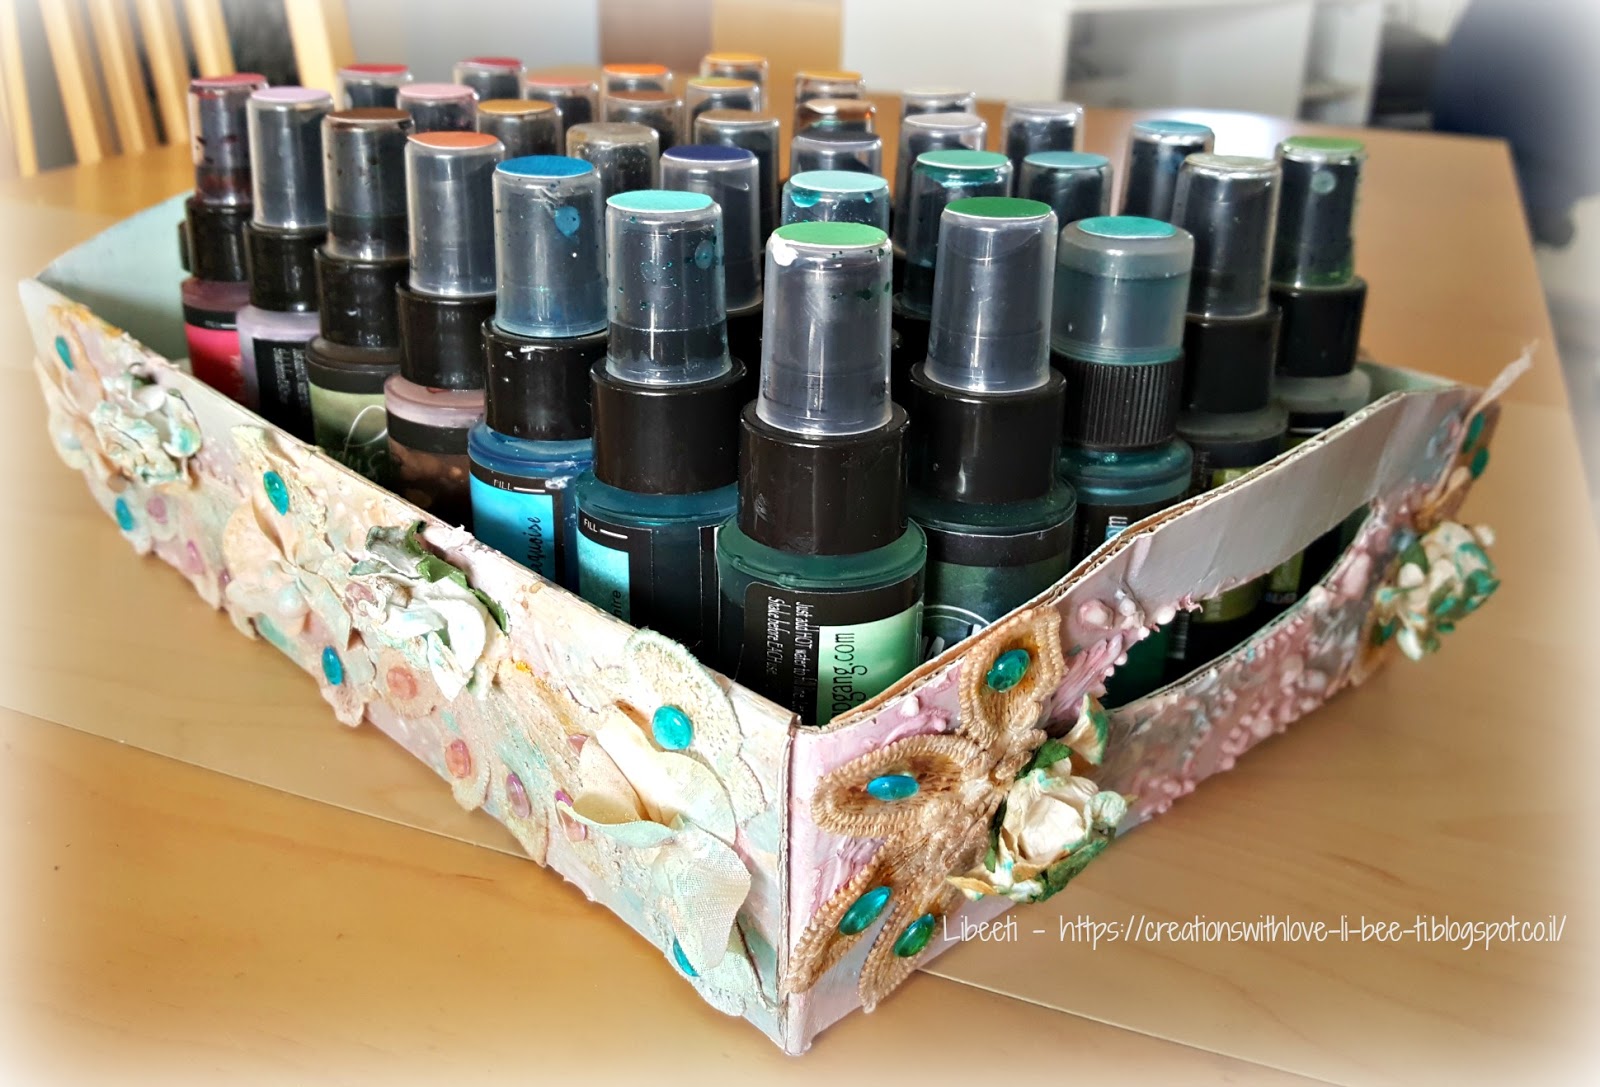
Since I love to alter and re-use, I decided to take this cardboard tray I got ages ago, and make a shabby chic style tray for all my LSG sprays and embossing products.
This is how the tray looked at the begining:
At first, I unfolded the tray and coverd it with gesso. Then I added some texture with stencil and modeling paste.
The next stage was coloring with Lindy's Gang sprays, diluted with water. I used TiffanyLou Blue and Cotton Candy Pink.
Next I adhered lace flowers and leaves and added some more color with Steampunk Sepia and Creeme Brulee Cream. Adding some flowers and coloring them also with some TiffanyLou Blue.
For the final touch, I embellished the tray with the fab Robin's Nest Dew Drops. They add such a wonderful touch to every project!


And now I have a shabby chic style tray to store my LSG products!
Thank you for visiting my blog. I appreciate your comments very much.

Friday, February 9, 2018

A treat box - Simple Stories Vintage Blessing

Hello dear friends, 
Here's another box I've made, this time it's a treat box, would be filled with yummy treats as a gift.
It measures 7"x4.5"x2.5" and I've made it from a very thick cardstock, so it's very steady.
I used papers from the beautiful Simple Stories' Vintage Blessing collection. I love this collection so much! warm, floral, home feeling - a wonderful collection.
Here are some close-ups:


I would like to enter it to the following challenges:
Scor pal - more than one fold 'anything goes'. I scored and folded the box and then adhered the panels.
Love to craft - anything goes
Pile it on! - 3D embellishments
Thank you for visiting my blog. Your comments are much appreciated.


Monday, February 5, 2018

A wedding card - Love is in the air at Altair Art

Hello dear friends! 
I'm so excited to share with you my first project for Altair Art, for our 2018 1st challenge, which is 'Love is in the air'. 
I've used my Feb Counterfeit Kit for this card.
The beautiful romantic papers of Altair Art are so perfect for any 'love' theme project, and I will share with you more projects I've made with their gorgeous papers during this month.
This time I've made a wedding card, with the beautiful papers from two collections:
I also used some IAR flowers, Robin's Nest's dew drops. For the topping I adhered some micro beads and gave some white gesso splatters. I also added some gauze between the layers.
On the front cover I've stamped a phrase from Song of Solomon, and framed it with a die-cut from one of the beautiful papers.
Inside, I stamped another biblical phrase concerning the happines of the wedding, and adhered a flowery heart die-cut from another Altair Art papers. On the other side I adhered a die-cut of a bride and groom.
Here're some close-ups on the details:


We would LOVE you to join us in this LOVEly challenge at Altair Art.

I would like to enter this card to the following challenges:
Summer Studio - moodboard no. 40. I was inspired by the pale shabby chic colors and atmosphere, the color combo of gray and pink, and the heart/love theme.
Mixed Media Warriors - moodboard
I was inspired by the heart, flowers and the soft pink colors. I went with light mixed media thechnique - using different mediums (ink and gesso) and materials (papers, lace, gauze, microbeads and dew drops).
Cas-ual Fridays challenge - heart
SimonSays Monday challenge - love is in the air.
Thank you for visiting my blog. I appreciate your comments very much.


Saturday, February 3, 2018

DIY enamel dots - an easy how to tutorial

I've made my own enamel dots for my Feb counterfeit kit and here's a quick and easy tutorial how you can make your own enamel dots.
I hope you'll find it useful.
(p.s. don't use your regular baking oven, as the steam is not too healthy...)
Enjoy!

Friday, February 2, 2018

A Postcard from Paris - February Counterfiet Kit

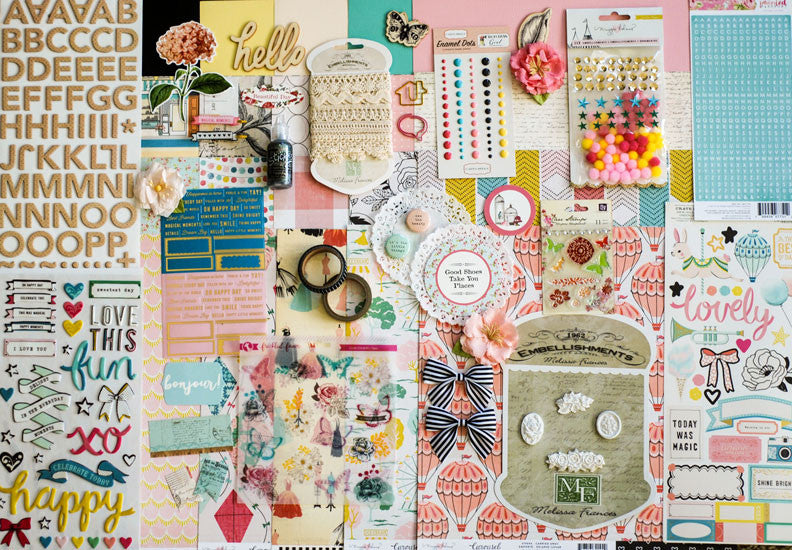
I'm playing again with the Counterfeit Kit Challenge. The inspiration kit for this month is 'Weekend in Paris' by Noel Mignon:
It's a very rich and luxurious kit, jam packed with lots of beautiful pp and embellishments, all in soft colors.
I have ton of photos from our journey to Paris, so the theme was perfect for me. I named my kit 'A Postcard from Paris'.
At first, I thought it's going to be a tough mission for me to counterfeit this kit, but let me take you through my process.
The first thing I was attracted to was the black/white bows, so I made 1 large bow and 2 small ones:
Then I picked the cardstocks, in matching colors to the inspiration kit.
The next stage was going through my endless pp, and I just couldn't stop adding more and more beautiful papers.
I just got my DT package from Altair Art, and it is full of beautiful papers! So naturally I've put some to these papers to my kit. I added 7 Dots Studio papers, Prima papers, Lemoncraft papers, and Blue Fern Studios papers. 
So this is how the papers in my kit look:
Now it was the alphas turn, but I couldn't resist adding some 6x6 pp too, once again from Altair Art and 7 Dots Studio:
Then came the fun part - gathering the embellishments!
Lace, flowers, flair buttons, crystals, die cuts, Robin's Nest dew drops, wood embellishments, pom pom trims, crochet flowers, baker's twine, washi tapes, DIY enamel dots, resin embellishments, chipboards, rub-ons, stickers, and gold sequins. I didn't have any puffy stickers, so I counterfieted them by die cutting some foam with words dies.
And some close-ups:


Since my table was still ful with beautiful papers and embellishments, and I just couldn't put them back, I've made an Add-ons kit:


I'm not sure I will actually use all of the content of my kit this month, but I had so much fun gathering it and I will sure try to use up as much as possible.
I'm already working on a project, using this kit, so please stay tuned...
Thank you for visiting my blog. I appreciate your comments very much!

Thursday, February 1, 2018

Spring celebration at Disneyland

It's Feb 1st, and it means reveal day both at Stuck?! Sketches and at CSI.
Here's the sketch from Stuck?! Sketches:
And the case file from CSI:
And this is my take on these two:

The photo was taken on our visit to Disneyland Paris. There was a great Spring Celebration, with a wonderful parade. with all those cute Disney's lovely characters.
I went with the traditional way to solve the CSI case file, i.e. color scheme, clues (evidence) and testimony.
The clues I've used were: solid white background, mixed media background, floral patterns, flowers and music elements (which were so proper for the parade photo!).
For the testimony - I've added flowers to my journaling tag.
Here're some close-ups on the details:


Thank you for visiting my blog. I appreciate your comments very much.